Easy Sourdough Focaccia Bread Recipe
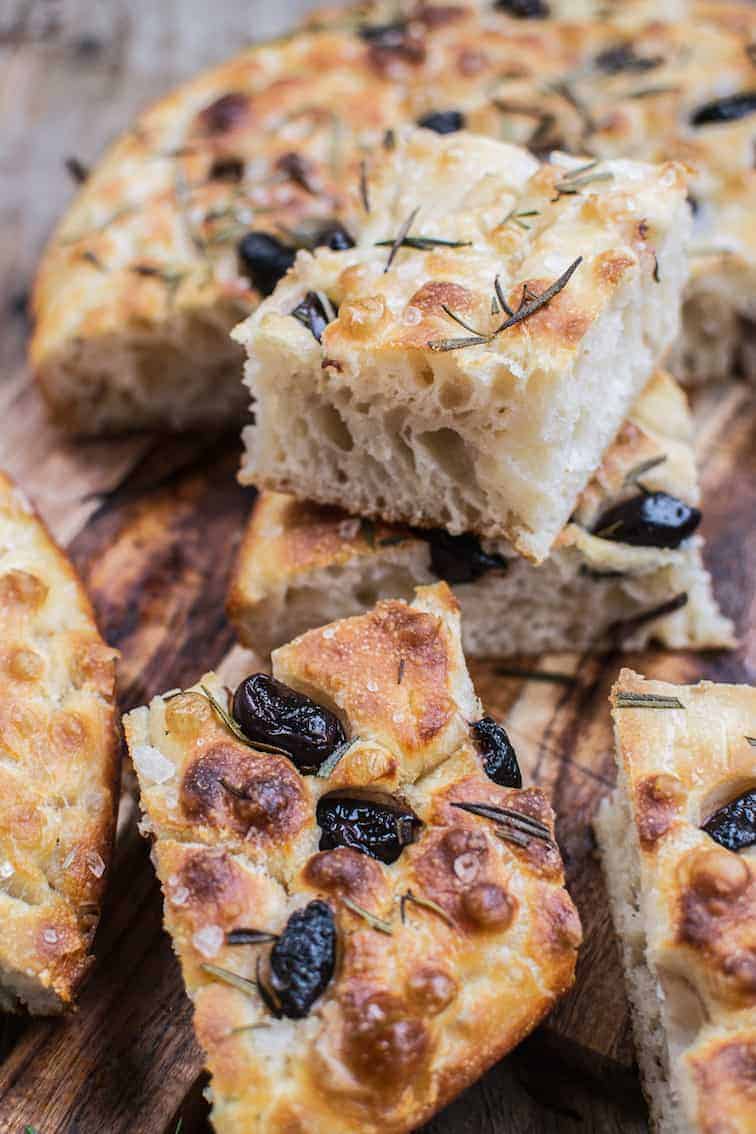
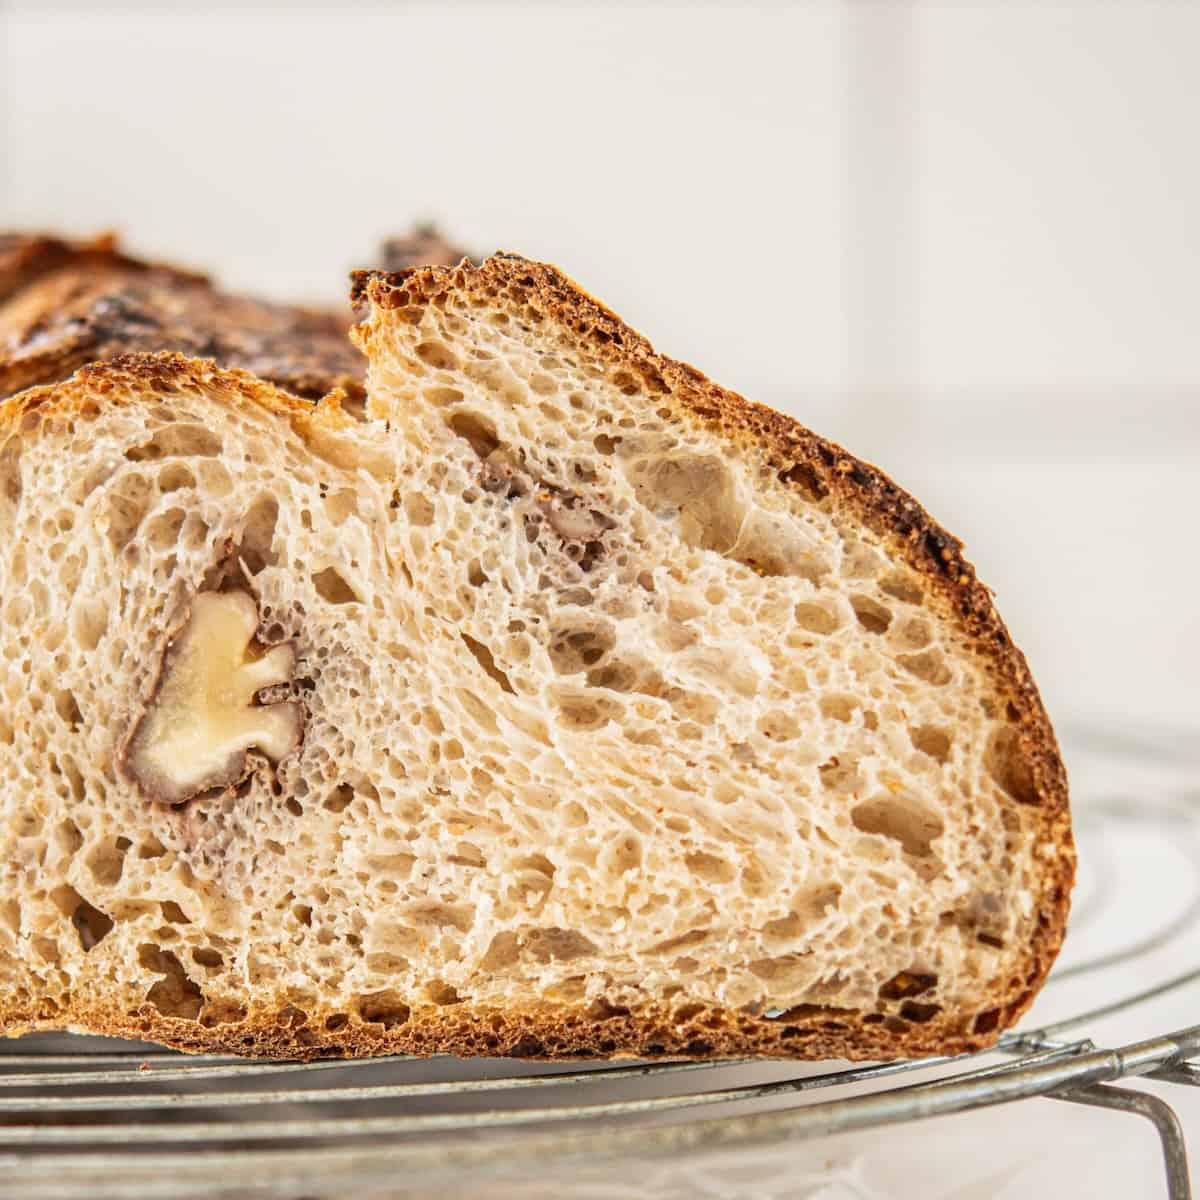
This simple sourdough focaccia recipe has a chewy and soft interior and a deliciously crispy exterior.
This combination of texture in this homemade focaccia comes from an airy sourdough-leavened dough that’s coated in a generous amount of olive oil.
While it bakes, the olive oil crisps up the outside of the dough. This gives the best crispy crust which contrasts so well with the airy interior and chewy crumb.
Sourdough focaccia has been one of those sourdough recipes that’s been requested by a few of my readers. The best part is, I love focaccia so I was more than happy to create a sourdough version! It’s a simple bread that makes the best sandwich bread. Or, just eat it as is.
It’s a process spread over two days. It’s a wetter dough, but very fun to work with and with little effort required.
What is focaccia bread?
Italian focaccia bread can come in various forms and with various names depending on the region it comes from. Ligurian focaccia, Genovese, Seravezzina to name a few. Ultimately it is a yeasted flatbread. Depending on what region of Italy it comes from it can be thin, or thick and fluffy, savory or sweet.
A basic focaccia recipe is made from flour, yeast, water, oil, and salt, but the toppings and flavors can vary. This sourdough version uses a sourdough starter for the leavening with no commercial yeast.
As the ingredients list is so simple, it helps to use a good quality olive oil to bring the most flavour.
Equipment
There isn’t a mixer needed for this recipe as it’s easily stretched and folded by hand.
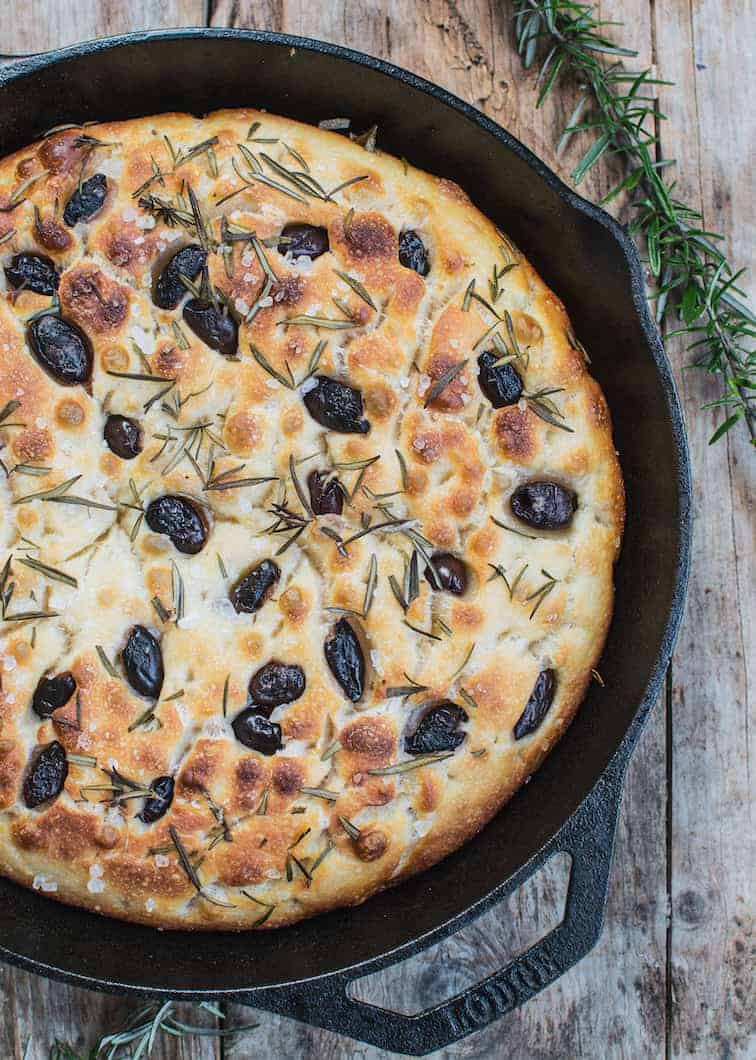
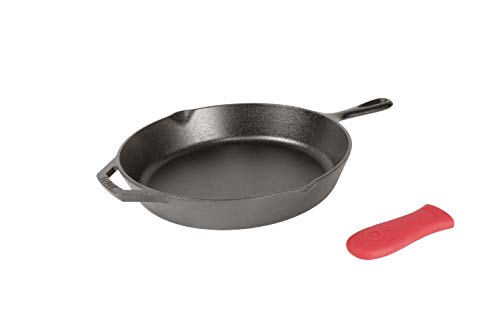
A cast-iron skillet to bake it in is recommended. This creates the best ‘fried’ crust on the focaccia bread, for the best flavour.
A 12inch / 30cm cast iron skillet fits this dough best. Alternatively, a slightly smaller skillet or 9 x 13inch / 23x33cm rectangle baking pan could be used too.
Baker’s schedule
More details for the sourdough foaccia are in the recipe card below along with the final recipe and ingredients but here is an outline of timings. They are flexible to fit around your schedule, so tweak if you need to to find what works.
Day 1. This is the feeding of the starter and the mixing and stretching of the dough in a large bowl. The dough then goes in the refrigerator for a long cold-proof overnight. This cold-proof part is important for flavour.
Day 2. The cold dough is pressed into a pan along with a few tablespoons of olive oil. It is then left to rise and double and in size. Afterward, it’s topped with flaky salt, herbs, and olives, and baked.
I love a simple olive and rosemary focaccia bread, so I top mine with chopped fresh rosemary and kalamata olives. The flavour combination of those is two is classic and perfect.
The sourdough starter
You need an active starter for this sourdough focaccia bread.
I use a ratio of 1:2:2 to feed my sourdough starter in preparation for the dough. That means 1 part starter, 2 parts flour, and 2 parts water, all measured in weight. For this bread, I measured out 35g starter, 70g flour, and 70g water. I measure this on a digital scale.
This made approximately 175g starter. 120g is used for the focaccia and the sourdough discard after can be fed and stored in the fridge ready for the next time. Use the starter when it has at least doubled (if not tripled) but before it collapses for the best result.

Mixing
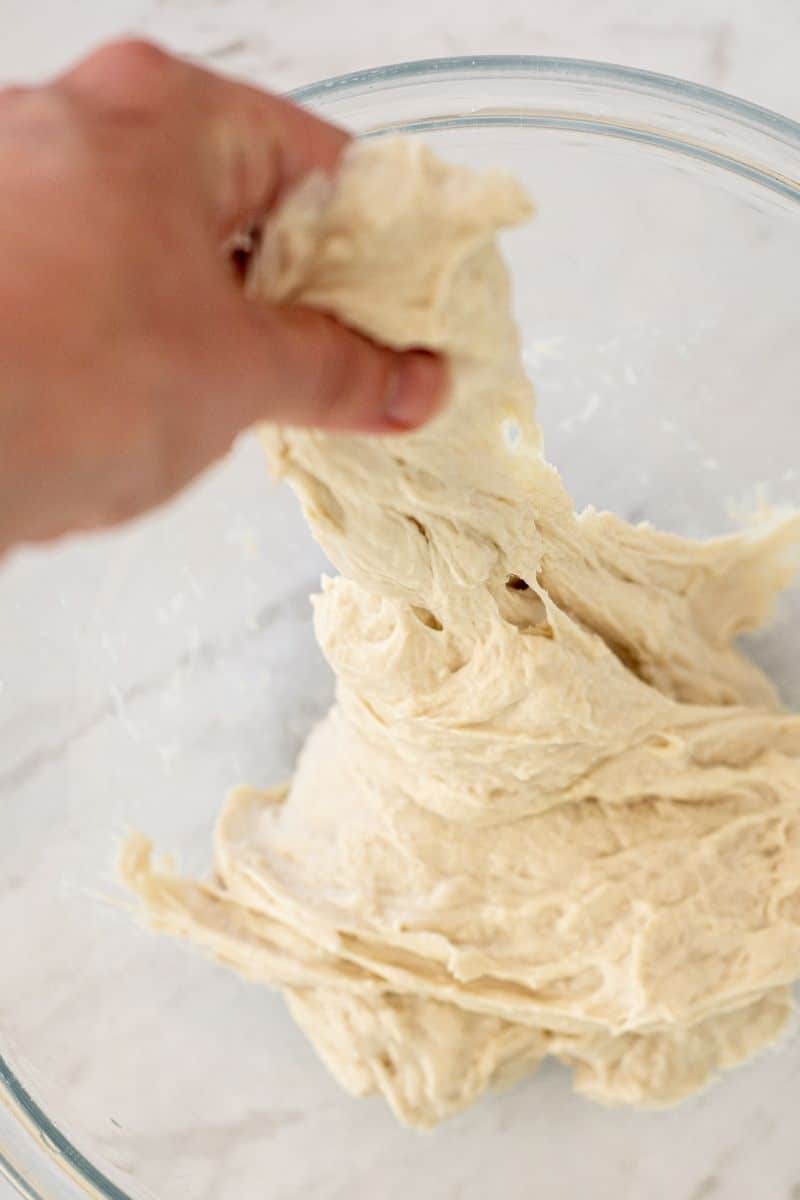
This easy sourdough focaccia uses a very wet dough with nearly 87% hydration. However, the working of the dough itself requires minimal effort. A few stretches and folds give it some strength, but the rest is relying on a long and slow fermentation.
When the starter has nearly finished rising, combine the main bread flour and water into a large mixing bowl. Use a wooden spoon to mix it into a very wet and shaggy dough and leave it to autolyze. This is the period where the flour hydrates and it helps it become extensible and easier to work with. Use a strong all-purpose white flour or bread flour with a protein level of at least 11% for best results. You could use a mix of whole wheat and all-purpose flour too if you like.
When the starter is ready it’s added to the dough along with the salt. Use wet hands to squish this together until well combined. This sloppy wet dough now sits for 15 minutes, and then it’s time to start stretching and folding.
Folding
I usually prefer a coil fold when making sourdough bread but for the focaccia, I’m doing a traditional stretch and fold because I find it easier to do so in this case.
Over a period of 2 hours, perform 4 sets of stretch and folds, one every 30 minutes. In each set, stretch and fold the dough over 4-5 times, turning the bowl each turn. As each set passes, the dough becomes more and more elastic.
Each time the dough sits, cover the bowl with a plate to stop the top of the dough from drying out.
After the final stretch and fold the dough sits at room temperature around for 2-4 hours. There should be signs of bulk fermentation happening in the dough with many bubbles appearing. This depends on the temperature of your kitchen. A cooler kitchen will the dough to sit a bit longer.
Transfer the dough to an airtight container or cover the bowl with compatible plastic wrap or beeswax wrap. Place it in the fridge overnight, or for up to 24 hours for a long ferment. It can be in the fridge for a long time if that suits your schedule. The yeast fermentation process is slowed in cool temperatures, but the bacteria get to work and bring the flavour.
Shaping
The next day, remove the cold dough from the fridge and generously pour a good quality olive oil into a baking pan or cast-iron skillet. A lot of olive oil needs to be used. This creates that delicious and crispy fried texture and will stop the bread from sticking in the pan.
I like baking my focaccia in either my 26cm or 30cm cast-iron skillet. The pictured focaccia is in a 30cm skillet (the 26cm skillet makes a slightly higher bread). Alternatively, you could use a 9×13 inch (33 x 23cm) baking pan to bake focaccia. Whatever baking tray you use, pick something with high sides, not a sheet pan because you’ll be pushing the dough to the edges of the pan and it will rise high.
Rub some extra virgin olive oil on your fingers and push the dough out to fill the corners of the pan. The cold dough will likely spring back at first. If this keeps happening, press what you can and then wait 10 minutes before continuing.
Once it has filled the pan, let the focaccia dough rise and double in size until it is jiggly and puffy. This can take anywhere between 3-7 hours depending on room temperature.
If it’s very cold in your kitchen you can create a warm spot by gently preheating the oven, then turning it off but keeping the light on.
You can cover the dough at this point or, brush it with extra virgin olive oil to stop the top of the dough from drying out.
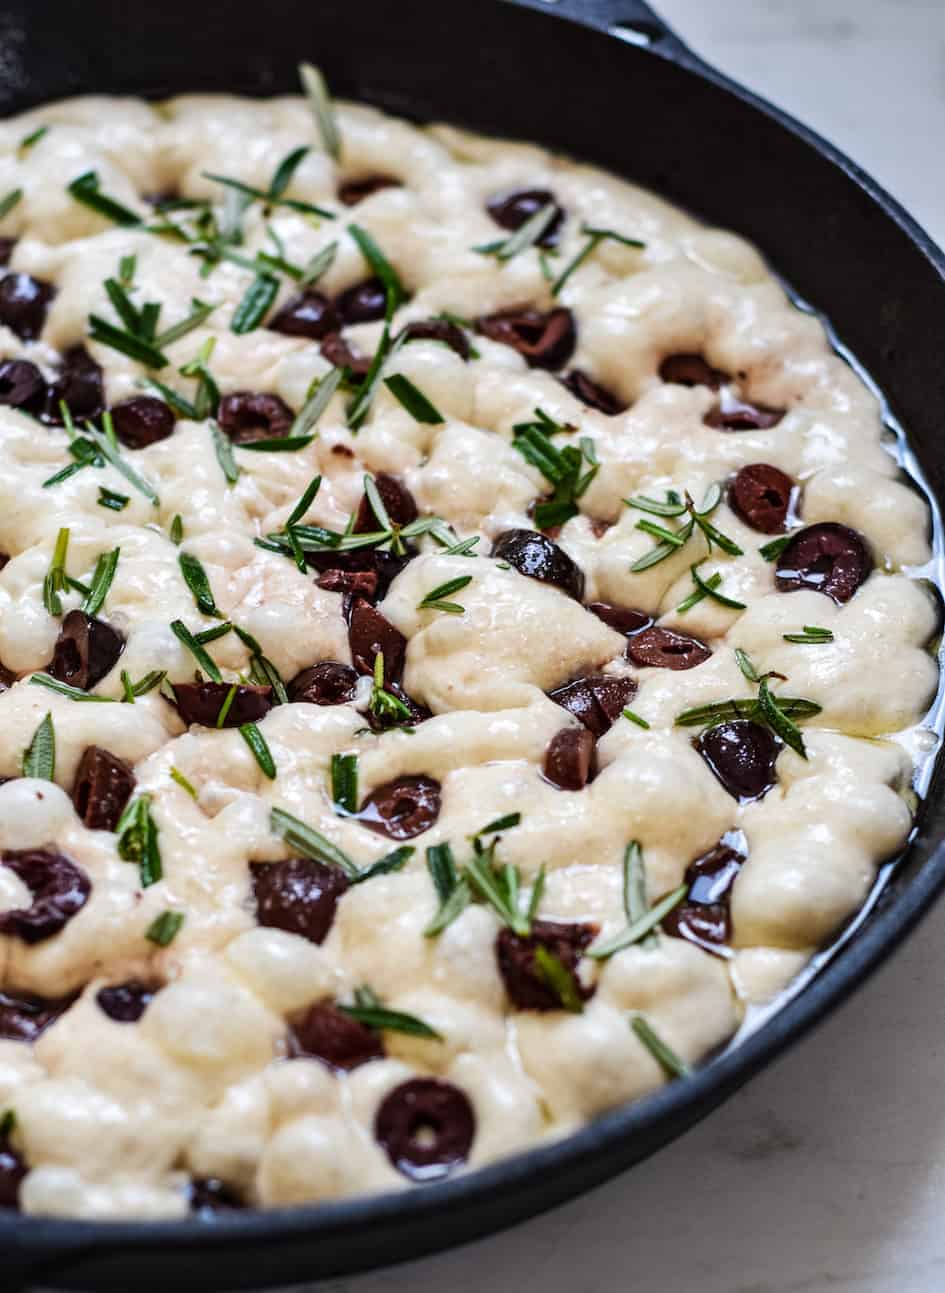
Dimpling dough
Now is the fun part!
The dough should be puffy after rising, and now it’s time to create some dimples into this dough. This is to de-gas the dough a bit, so it doesn’t rise too high in the oven. It also creates perfect little pockets for toppings!

Fresh herbs, thinly sliced potatoes, onions, feta to name a few. My favourites are fresh rosemary, olives, and flaky sea salt.
You could use cherry tomatoes, coarse sea salt, thinly sliced potato, capers, thyme, onion, garlic cloves…so many possibilities!
Baking
Preheat the oven to 210°C (410°F) fan-bake or 230°C (446°F) regular oven. Bake the focaccia bread in a hot oven for 20-25 until it is golden brown.
Remove it once baked and while it is hot from the oven, run a butter knife along the edge of the cast-iron skillet to loosen the edges. This so that the bread can be lifted out easily.
Transfer it to a wire rack and let it cool for around 10 minutes before slicing.
Eating
Fresh sourdough focaccia bread can be eaten as is. The flavours of salt, good quality olive oil, and herbs make it delicious all on its own. Focaccia bread can be used to make sandwiches, or the dough can be spread out thinner and used as the base for a pizza.
Focaccia bread that is older can be rewarmed in the oven. It makes a great bread to dip into soups or to mop up pasta sauces.

Storing
Focaccia can be stored covered, at room temperature for up to 4 days. It can also be wrapped tightly and frozen for up to three months.
More sourdough bread recipes
Want more sourdough bread recipes? Then try these soft sourdough rolls or this honey oat sourdough bread.
Looking for sourdough recipes that are not bread? Then check out this chocolate cake with sourdough starter or get inspired and make these homemade sourdough Danish pastries.

Sourdough Focaccia
This sourdough focaccia has a chewy and soft interior and a deliciously crispy exterior.
Ingredients
- 550g strong all purpose flour or bread flour, with a protein level of at least 11%
- 470g water
- 10g salt
- 120g active and doubled starter,
- 4-5 Tbsp good quality olive oil
- 1 Tbsp flaky sea salt
- Toppings of your choice , E.g olives, rosemary, capers, tomatoes, onions, garlic, thinly sliced potatoes...
Instructions
Day 1
- In the morning feed your starter so you can use 120g of it once it has risen.For this dough it could be 35g starter, 70g flour and 70g water. This will make approximately 175g starter. 120g can be used for the dough and the remaining starter can be fed again 1:2:2 and stored for the next time you need it.
- When the starter has nearly finished rising, the main bread flour and water are combined in a bowl to autolyse. When the starter is ready, add it to the dough along with the salt. Use wet hands to squish this together until well combined. Let it sit for 15 minutes.
- Over a period of 2 hours, perform 4 sets of stretch and folds, one every 30 minutes. In each set, stretch and fold the dough over 4-5 times, turning the bowl each turn. As each set passes, the dough becomes more and more elastic.
- After the final stretch and fold the dough sits at room temperature (between 20-24 °C) for 2 hours before being transferred to the fridge for 8-20 hours.
Day 2
- The next day, remove the cold dough from the fridge and drizzle 3tbsp olive oil into a cast iron skillet. Both 26cm and 30cm pans work well. Alternatively use a 23 x 33cm (9x13 inch) rectangular baking pan.
- Rub some olive oil on your fingers and push the dough out to fill the pan. The cold dough will likely spring back at first, so press what you can and then wait 10 minutes before continuing.
- Once it has filled the pan, the dough needs to rise and double until it is jiggly and puffy. This can take between 3-7 hours depending on room temperature. You can cover the dough at this point or, brush it with 1 tbsp olive oil to stop the dough drying out.
- Preheat the oven to 210°C (410°F) fan-bake or 230°C (446°F) regular oven.
- Once the dough has risen, use greased fingers to dimple the dough. Press in your favourite toppings and scatter over some coarse sea salt.
- Bake the focaccia for 20-25 minutes until deep golden brown.
- If using a cast-iron skillet, while it is hot from the oven, run a butter knife along the edge of the cast-iron skillet to loosen the edges, so that the bread can be lifted out easily. Lift the bread from the pan and place it on a cooling rack. Serve warm or at room temperature.
Recommended Products
As an Amazon Associate, a Mighty Ape affiliate and member of other affiliate programs, I earn from qualifying purchases.
Nutrition Information:
Yield: 6 Serving Size: 1 gramsAmount Per Serving: Calories: 453Total Fat: 10gSaturated Fat: 1gUnsaturated Fat: 0gSodium: 1944mgCarbohydrates: 78gFiber: 3gSugar: 1gProtein: 11g


Not even a joke! This is the most delicious focaccia I have ever tasted! Very moreish ❤️❤️❤️
Just made this! Came out just like the pictures and tastes AMAZING! I made it with kalamata olives and rosemary. YUM! Thank you for this recipe!
Made this…..big hit!!! everyone loved it…Thank you
Best focaccia ever! On day 2 I proofed it on a parchment paper and preheated the cast iron skillet, and baked it for 25 minutes in 245c oven and it came out perfect. Thank you for a great recipe!
I make several kinds of breads, but this recipe is the most popular in our house. Thank you for crafting it!!
Thank you so much for making it! ☺️
Amazing! I’ve done, the texture and surface just like yours. I love this recipe very much!
Just baked this bread. Turned out awesome. Comment:. At 410 degrees convection oven I had to bake for about 40 mins for the top to get brown. Haven’t tasted it yet. I’m sure its delicious! I’m on the coast in NC, USA. Altitude may play in the timing. I’d wish I could post pictures.
Thank you! Yeah ovens can differ so much, can’t they! I’m glad you tweaked the timing to get the right amount of caramalisation
on the bread 🙂
Made this for a crowd and it was a hit! First time making a focaccia so I was a but nervous but it was perfect. Really simple and easy to follow instructions too. I put basil and tomato on one side and olives and rosemary on the other
Yay so happy to read this! 🙂
My attempt just came out of the oven. Holy Toledo it’s delicious! We simply sprinkled herb du province and pink salt on top, baked it in a regular oven tray and it came out DELICIOUS.
Thank you kindly for this wonderful recipe. It is sure to be treasured and repeated many many times into the future. Merci !
Awesome!! So happy you loved it!
Thanks Elien, this turned out perfectly and was enjoyed by all at Sunday lunch. Beautiful texture as a dough and then as the finished bread. Will be on the repeat list as your recipes all are. Have to say you’ve been my inspiration for working out sourdough baking! Your instructions are the first to make real sense to me and the ratios for feeding and maintaining the starter have been the key to great results. Thanks so much!
Second time I made the focaccia. Even better than the first time. But I have one issue. The first time a small part stuck to the skillet. I use the Lodge brand as you do. After the first first time, I seasoned the skillet. But today the focaccia stuck badly to the pan. Any suggestions?
Hey Andre, you might need to let it cool for a few minutes before lifting it from the pan. I run a knife along the edge when it comes from the oven to loosen it but sometimes the bottom doesn’t remove for me right away either so I need to let it sit a wee bit and then it does!
Have you had any success baking this off in a high rimmed baking sheet? I am considering using parchment and doubling the recipe. Thoughts?
Yes that would work! I’ve done that 😄
Hi, my dough has not risen for the second rise after the fridge, it’s been at 70 degrees for 3 hours and then in a Brod and Taylor for 3.5 with no real signs of doing much.
When I took it out of the fridge it was huge, well over double in size, I thought i was on to a winner lol
Any suggestions?