How to Make Sourdough Starter
This sourdough starter recipe shows how to make a sourdough starter from scratch.
Take the time to read through this post. I walk through the entire process and sourdough starter troubleshooting in detail so that you can get your own sourdough starter up and running. It may seem daunting at first but once you get the hang of it, it is a simple process.
For a sourdough bread, troubleshooting guide, check out this Sourdough Bread Troubleshooting post or how to maintain a sourdough starter.
What is an active sourdough starter?
A healthy and active starter is the heart of homemade sourdough bread, english muffins, or rolls. Making a starter that will become the rising power for these loaves isn’t hard to do but it requires time and patience.
A sourdough starter is a living thing. It is essentially a collection of wild yeast and bacteria that feed off a mixture of flour and water. Flour and water are added daily to provide a fresh food source.
Initially, when starting a starter, it’s a gradual process of catching and nurturing these wild organisms and giving them food and the ideal environment to grow.
Later on, when the starter is ready to bake with, the wild natural yeast will be responsible for the bread’s rise as it releases carbon dioxide. There is no need for commercial yeast in a bread recipe made with sourdough.
What bacteria is in sourdough starter?
The bacteria in the starter, which is the lactobacillus strain, also release carbon dioxide, but not as much as the yeast. The bacteria is responsible for the sour flavor and tang in sourdough bread. This is due to the lactic and acetic acid they produce.
It is important to nurture and grow the yeast colony in the new starter so it is strong enough to leaven your bread. This takes time, but it’s crucial if you want a good result.
How to make a sourdough starter
Creating your own starter can be different for everyone. It depends on the temperature of the room, humidity, yeasts in the air, and different types of flour. This can all change how quickly or slowly your starter grows and becomes active. Here is a basic guide on getting started.
To create a starter, you need flour and water, and for best results use a kitchen scale for measuring. You will need equal amounts of flour and water, measured in weight.
What flour for sourdough starter
Different flours can be used but I recommend using unbleached all-purpose flour or bread flour for this process and saving the nicer flours for the actual bread baking. Any grain-based flours can work whether it’s rye, whole wheat flour, or einkorn, but general unbleached all-purpose or bread flour gives the most consistent results. A starter made with white flour can still be used in whole-grain flour bread later on.
Rye flour is often used in starter creation as this can make the starter appear active faster. However, the signs of fermentation are often due to extra bacterial action which may look bubbly and active but doesn’t necessarily mean your starter is ready to go.
The bacteria grow much faster than the yeast. Because the bacteria also produce a little carbon dioxide, this can create bubbles in the starter very early on. However, these early bubbles do not indicate your starter is ready to bake yet.
Water for sourdough starter
What water to use with sourdough can be a hot topic. Some water sources can contain amounts of chlorine and other elements that could affect the starter process. Filtered water or tap water that has been boiled and left to cool is best to use.
Personally, I just use tap water. My tap water doesn’t seem to affect my ferments or sourdough starter, however, if you feel your tap water may hinder the fermentation process, it’s better to be safe than sorry and use filtered water.
The best temperature for sourdough starter
Yeast likes warmer environments in which to multiply. Keep your starter in a space between 70°F and 80°F (21°C and 26°C).
If the environment is too cold, a starter can slow right down. In hot environments, the fermenting process will be sped up and your starter may need extra feeding.
Cooler temperatures tip – In a cooler bag add a sealed jar of hot water, along with your starter. Close the bag to keep the heat in. This works well to create a warm space in the cold wintertime.
The sourdough starter feeding schedule
Here is day by day how to feed sourdough starter steps. The flour measurements below use 50g of flour and 50g of water as a base starting guide. If you like, this can be lessened to 30g or 40g, as long as you keep all the amounts consistent.
Day 1: combine 50 grams of flour and 50 grams of water in a glass container and stir very well. Leave in a warm place, out of direct sunlight, covered with a cloth.
Day 2– Feed your starter 50 grams flour and 50 grams water. This means, adding in a fresh 50g of flour and 50g of water and mixing it really well with yesterday’s mix.
Day 3: Pour 50g of the starter into a bowl and feed it 50 grams flour and 50 grams water. Mix it well. Discard the rest. Tip this freshly fed starter into a clean jar and use a rubber band to mark where the starter comes up to.
Making sure the new jar is clean and marking it with a rubber band will show clearly if the starter has risen or fallen.
Day 4-10: Pour 50g of the starter into a bowl and feed it 50 grams flour and 50 grams water. Mix it well. Discard the remaining starter. Tip this freshly fed starter into a clean jar and use a rubber band to mark where the starter comes up to.*
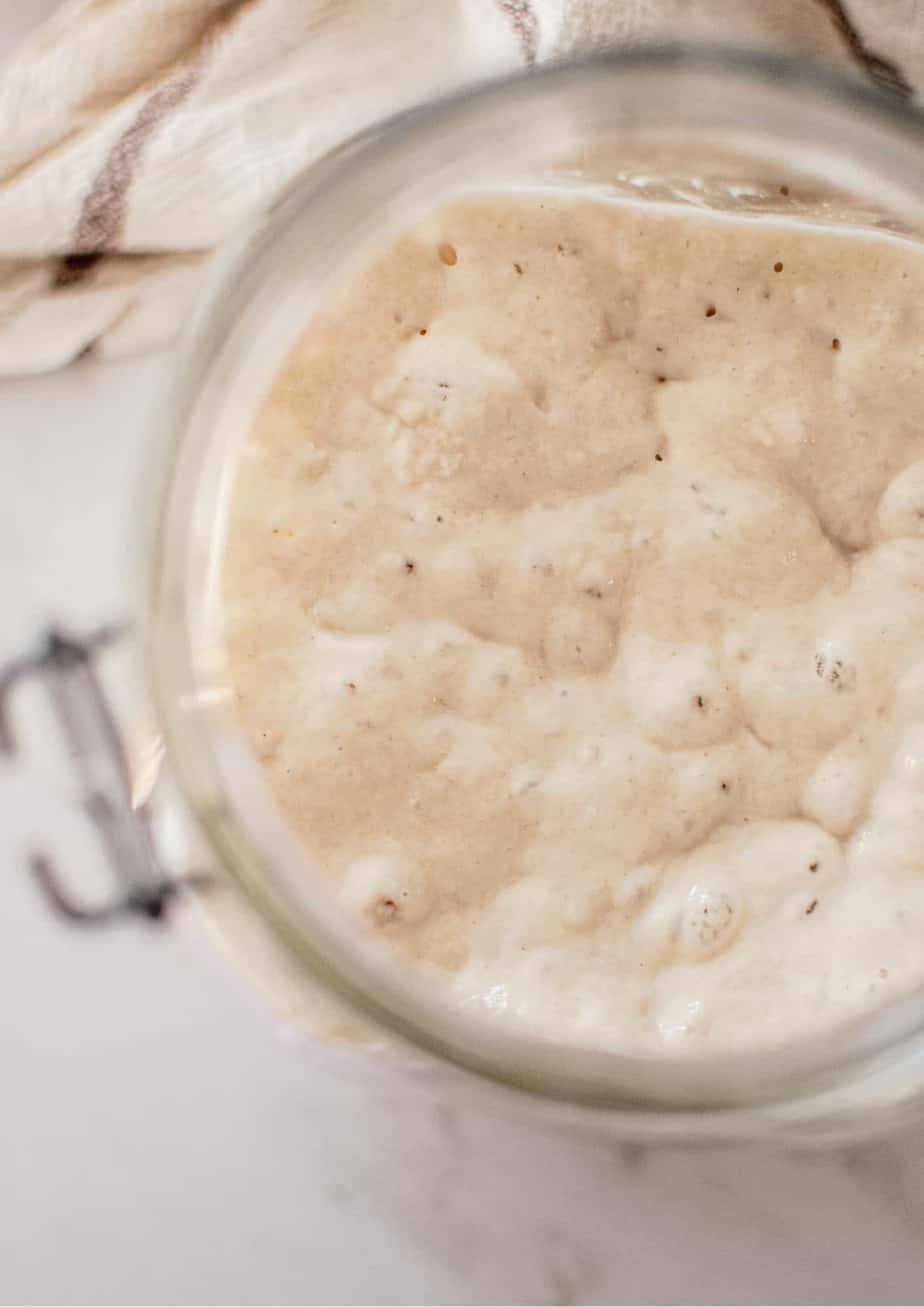
By day 4 or 5, your starter may have bubbles (or it may not yet and that’s fine!) and have a slightly sour smell. It’s not ready to bake bread with but it should have enough acid to be used in sourdough discard recipes like pancakes and cookies.
Things to watch for
You may not notice the starter is quite runny when it’s time to feed it again. This is due to the acid created by the bacteria and the alcohol from the yeast.
If your starter is splitting and forming liquid on the top or the bottom, check that the environment in which you are keeping your starter isn’t too hot. You may need to increase the feedings to 12 hourly if this keeps happening.
Sourdough starter feeding ratio
While you are creating your starter, you will be feeding it at a ratio of 1:1:1, which is equal parts flour and water measured in weight. It is important to measure the ingredients for a starter this way to keep it consistent.
Measuring in volume isn’t consistent as water weighs much more than flour so your starter will become too liquid.
The flour measurements above use 50g of flour and 50g of water as a base starting guide. If you like, this can be lessened to 30g or 40g, as long as you keep the amounts consistent.
If your starter is doubling easily by day 6 or 7, within 6 hours of feeding, you can start feeding it 1:1:1 twice daily.
By day 10 it may be ready to use. Test your starter’s activeness, as shown below.
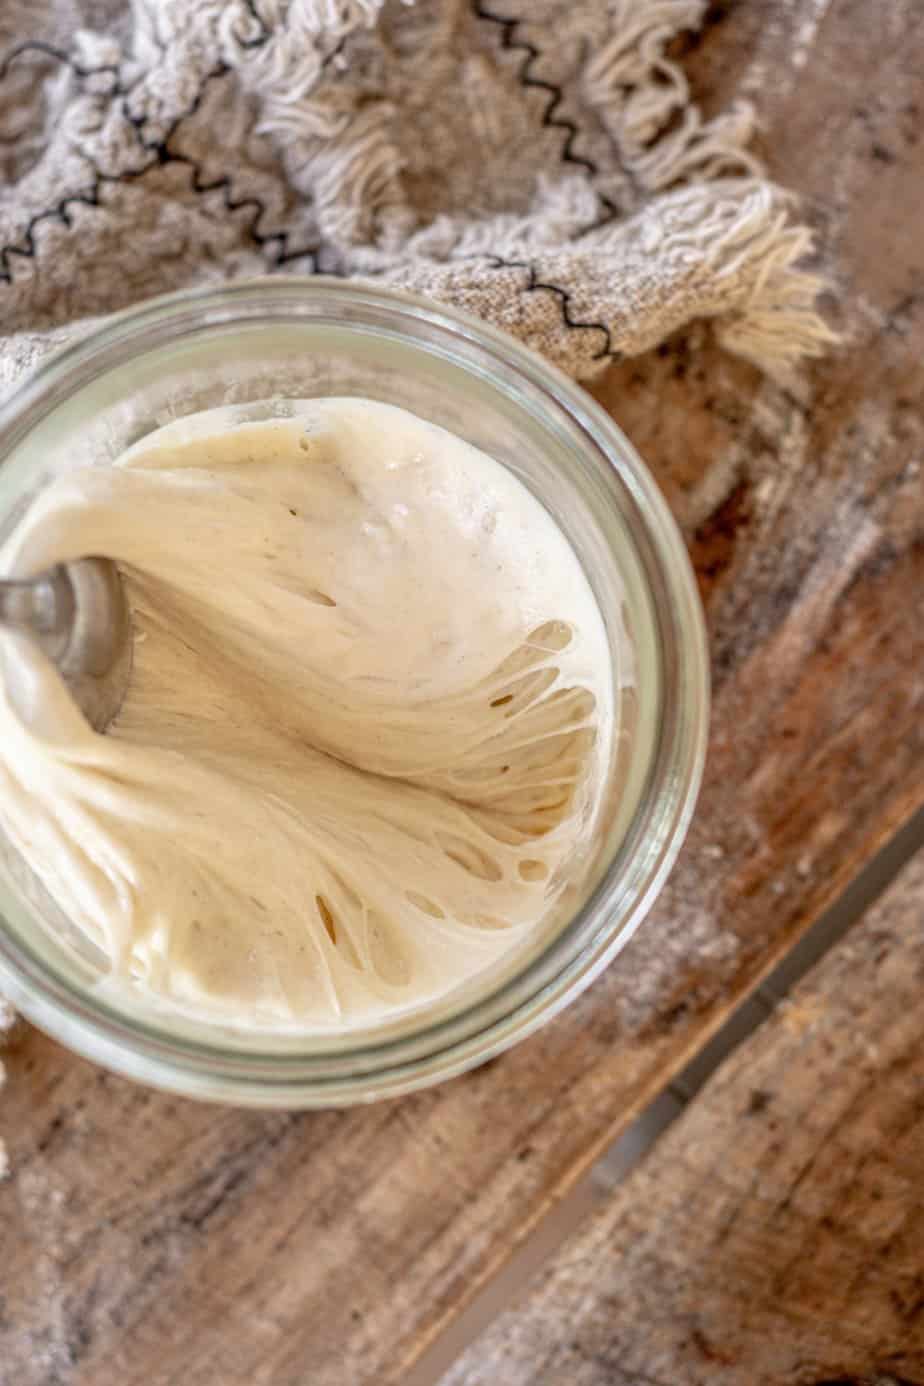
Starter activeness test
To test how active your starter is and if it’s ready to bake with, you’ll need your starter to double within 6 hours at a room temperature of 70°F – 80°F (21°C- 26°C).
You will also feed your starter at a higher ratio of flour and water to check if the yeast colony in your starter is large enough to inoculate this extra flour in under 6 hours. If it’s too slow, it will show the starter isn’t quite ready to bake a successful loaf.
This time you will increase the feeding ratio to 1:2:2 (starter:flour: water)
Take 1 part starter and feed it 2 parts flour and 2 parts water. Mix it well in a jar or glass. If you tie a rubber band around your glass jar to mark where the starter came up to before it rose, you’ll be able to see how much it has risen later on.
Pop the starter in a warm place, out of direct sunlight.
If it doesn’t double or triple within around 6 hours, keep feeding your starter for a little longer. Continue twice feeding 1:1:1 and try the test again later on.
Why discard sourdough starter?
Because you want to nurture your yeast and bacteria with ample food. By keeping only a small amount of starter and feeding it, there will be plenty of food to feed those organisms.
If you feed the entire starter new flour each day, it starts compounding and soon you’ll be going through an overwhelming amount of flour.
Delicious discarded sourdough starter recipes
- Sourdough Waffles
- Discard pizza dough
- Sourdough discard doughnuts
- Banana bread with sourdough discard
Sourdough starter troubleshooting FAQs
Chances are it was the lactobacillus bacteria in your starter forming those bubbles, and not the yeasts. Bacteria also create bubbles while they are converting sugars to lactic and acetic acid, but it’s the yeasts in the starter that will give rise to your bread. The yeast colony takes a little longer to establish itself. Be patient and keep feeding and refreshing your starter
Be patient and keep regularly feeding your starter and ensure it’s in a warm spot. If you’ve been feeding your starter for at least 6 days and it’s not bubbling you could experiment with an extra feeding, or check your water source and that it’s not hindering the starter.
This is a sign that your starter is hungry. Your starter might be fermenting a little too fast and the yeasts have run out of food. This can happen if the room your starter is in is too hot.
Check the temperature and fix it if it’s too hot before continuing. Then, carry on with the 1:1:1 feeds, but you can switch to 12 hourly feeds if it keeps splitting.
It is normal for a starter to rise, reach its peak, and collapse once it has run out of food. Once your starter can double within 5-6 hours after being fed 1:1:1, switch to 12 hourly feedings.
If it doubles within 4-5 hours with the increased feedings, try the starter activeness test.
Has the temperature changed? If it’s colder your starter will take longer to double. Have you increased the feedings? If you increase the feeds before the starter is ready, it will slow things down a bit.
If you keep up with regular discarding and feeding, in a fresh jar each time, your lactobacillus colony will thrive. As they do, the amount of lactic acid they produce will inhibit mould growth and harmful bacteria.
A contaminated sourdough starter is pretty rare. If you do see mould growing on your starter or it develops a pink, red, or orange tinge, discard it and start again.
Sourdough starter maintenance
Sourdough starter maintenance and looking after your starter are just as important as creating one. It’s important to keep it refreshed often so there is not a buildup of acid.
An overly acidic starter can ruin the gluten structure in sourdough bread, which can make it hard to work with.
To keep the acid content low, you can keep refreshing your starter 2-3 times a day at 1:1:1, or twice a day at 1:2:2. This may need to be increased if the environment is very warm.
Your starter will rise to its peak, after which it will collapse when the yeast has run out of food. Ensure you use your starter when it has at least doubled but before it passes this peak.
Once your starter is well established, it can be refrigerated when it isn’t being used. However, do feed it before placing it in the fridge. Either 1:1:1 if you plan to use it within the next day or two, or 1:2:2 if it will be longer.
The aim is always to keep the yeast active and happy and the acid content low.
–> For more in-depth information on how to maintain a sourdough starter.
Mature starter
The longer the time between the feeding of your starter the more mature your starter is and the more acid that accumulates in your starter. A starter fed and used within 6 hours will have less acid than if it was fed and used 12 hours later.
In the same regard, a starter fed 1:1:1 has a higher amount of seed starter than one fed at 1:2:2 and will have more acid.
Using a ‘young’ starter with a low acid content allows your dough to be a lot more stretchable and easy to work with. A starter with a high acid content can make it very runny and tricky to manage. It can turn your dough into a wet mess.
For a sourdough bread troubleshooting guide, check out this post here — Sourdough Bread Troubleshooting.
The world of sourdough is an exciting place and everyone has a different take on their bread and a different recipe. One thing I’m sure everyone will agree on is that a healthy active starter is a key ingredient.
Sourdough bread recipes

Sourdough Starter Recipe
A sourdough starter recipe to make your own simple sourdough starter + how to maintain it
Ingredients
- Unbleached all-purpose flour
- Filtered water
Instructions
- Day 1: combine 50 grams flour and 50 grams water in a glass container and stir very well. Leave in a warm place, out of direct sunlight, covered with a cloth.
- Day 2- Feed your starter 50 grams flour and 50 grams water. This means, adding in a fresh 50g of flour and 50g of water and mixing it really well with yesterday's mix.
- Day 3: Pour 50g of the starter into a fresh jar and feed it 50 grams flour and 50 grams water. (A ratio of 1:1:1.) Discard the rest.
- Day 4: Pour 50g of the starter into a fresh jar and feed it 50 grams flour and 50 grams water. Discard the rest.
- By day 3 and 4, your starter might be bubbling and have a slightly sour smell.
- Day 5-10: each day pour 50g of the starter into a fresh jar and feed it 50 grams flour and 50 grams water. Discard the rest.
- If your starter is doubling easily by day 6 or 7, within 6 hours of feeding, you can start feeding it 1:1:1 twice daily.
- By day 10 it might be ready to use, though it could be earlier. Test it using the starter activeness test as written below.
Notes
To test how active your starter is and if it’s ready to bake with, you’ll need your starter to at least double, or triple within 6-8 hours. You will also feed your starter at a higher ratio of flour and water to check if the yeast colony in your starter is large enough to inoculate this extra flour in under 6-8 hours.
Take 1 part starter and feed it 2 parts flour and 2 parts water. Mix it well in a jar or glass.If you tie a rubber band around your glass jar to mark where the starter came up to before it rose, you’ll be able to see how much it has risen later on.
If it doesn’t easily double within this time, it will need a bit longer of twice daily 1:1:1 feeds.
Nutrition Information:
Serving Size: 1 gramsAmount Per Serving: Unsaturated Fat: 0g