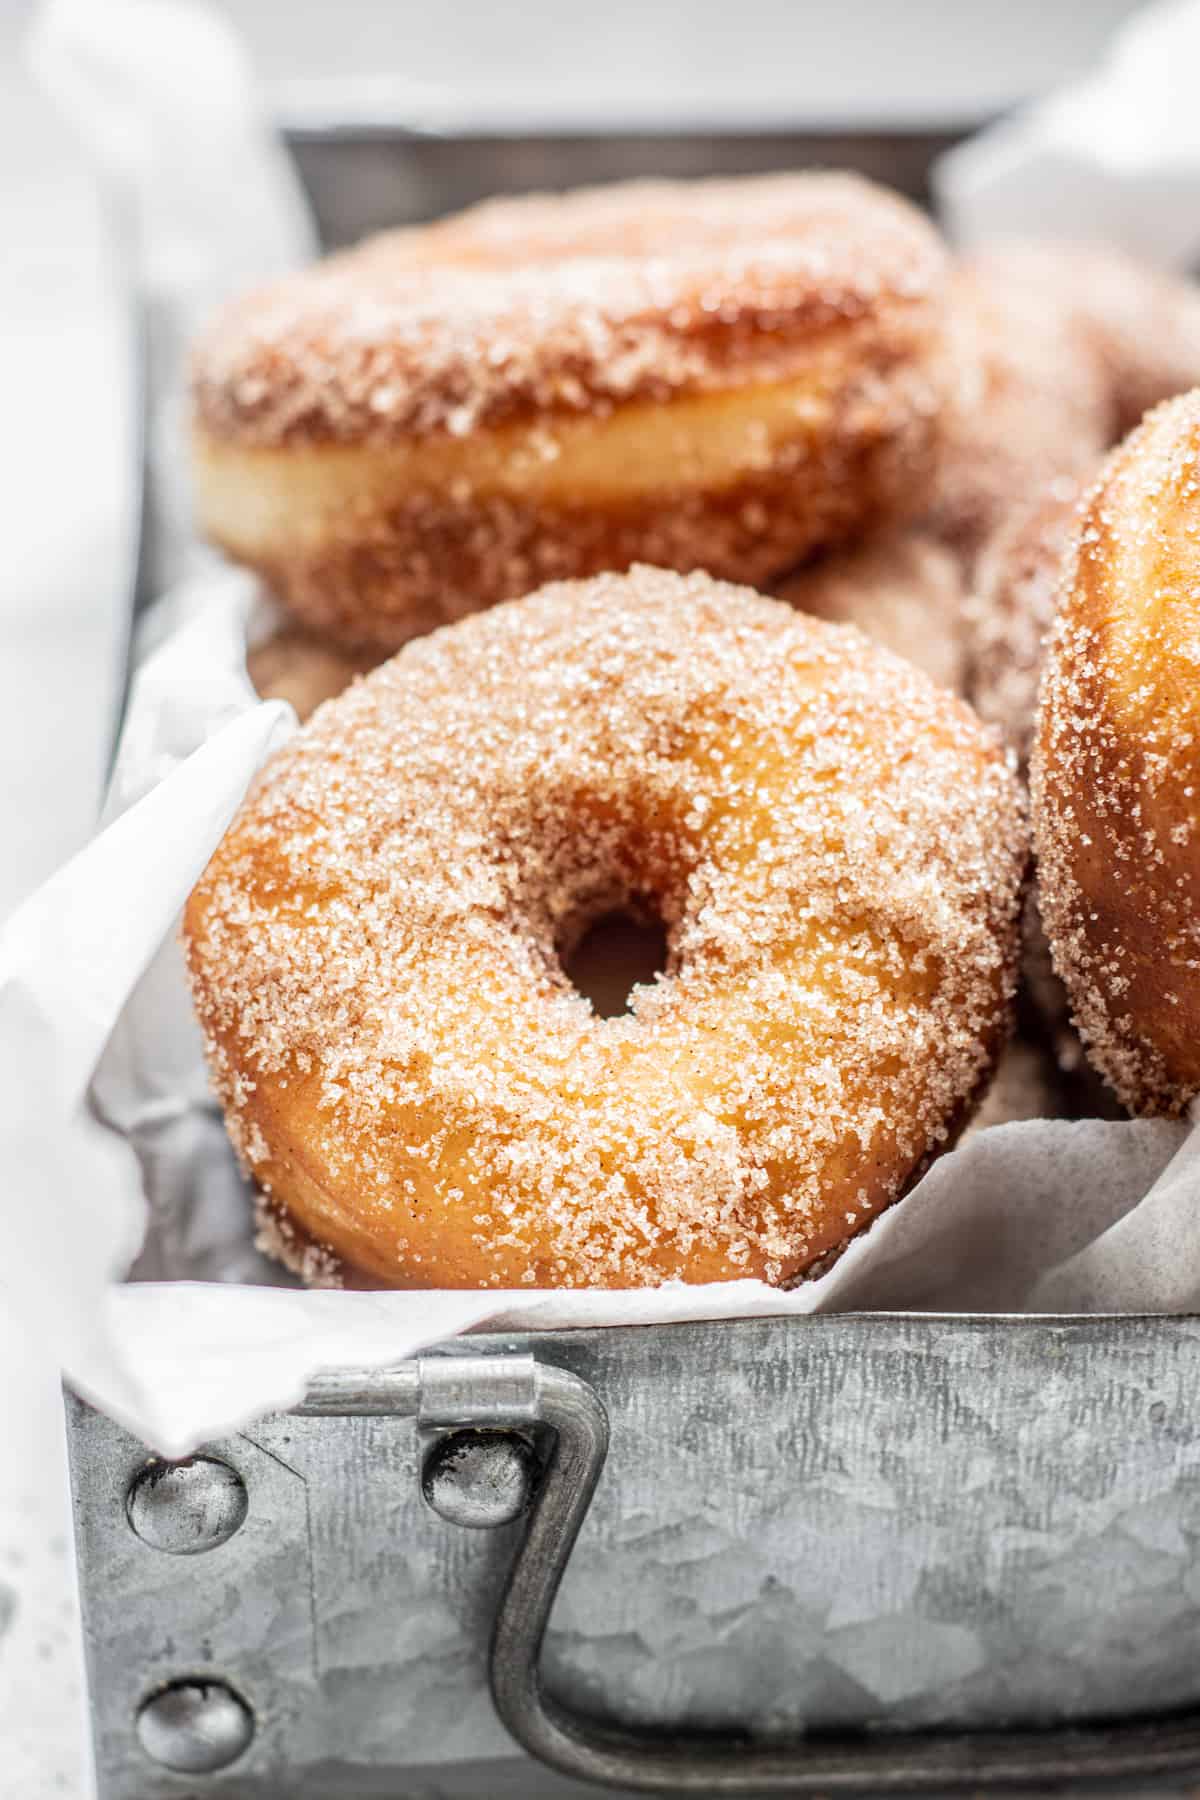
Fluffy Buttermilk Fried Donuts
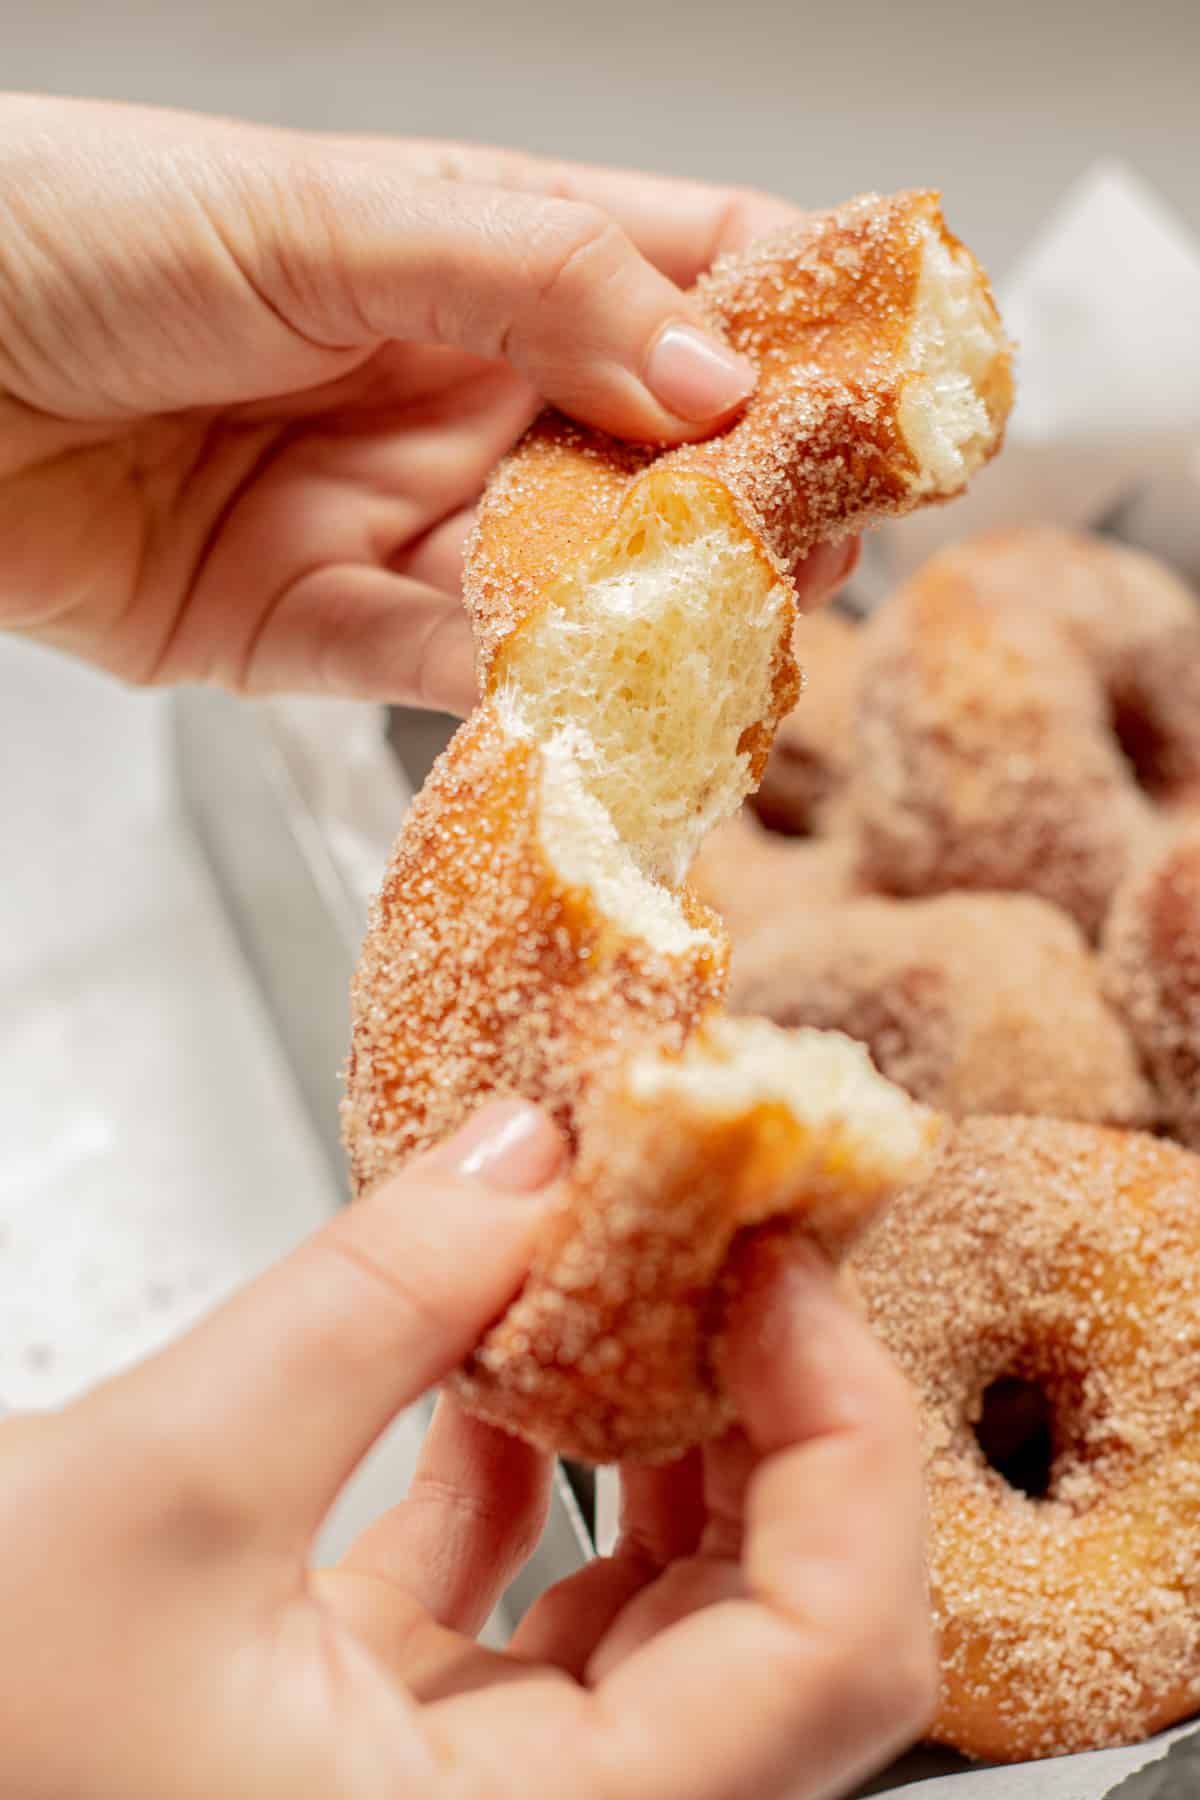
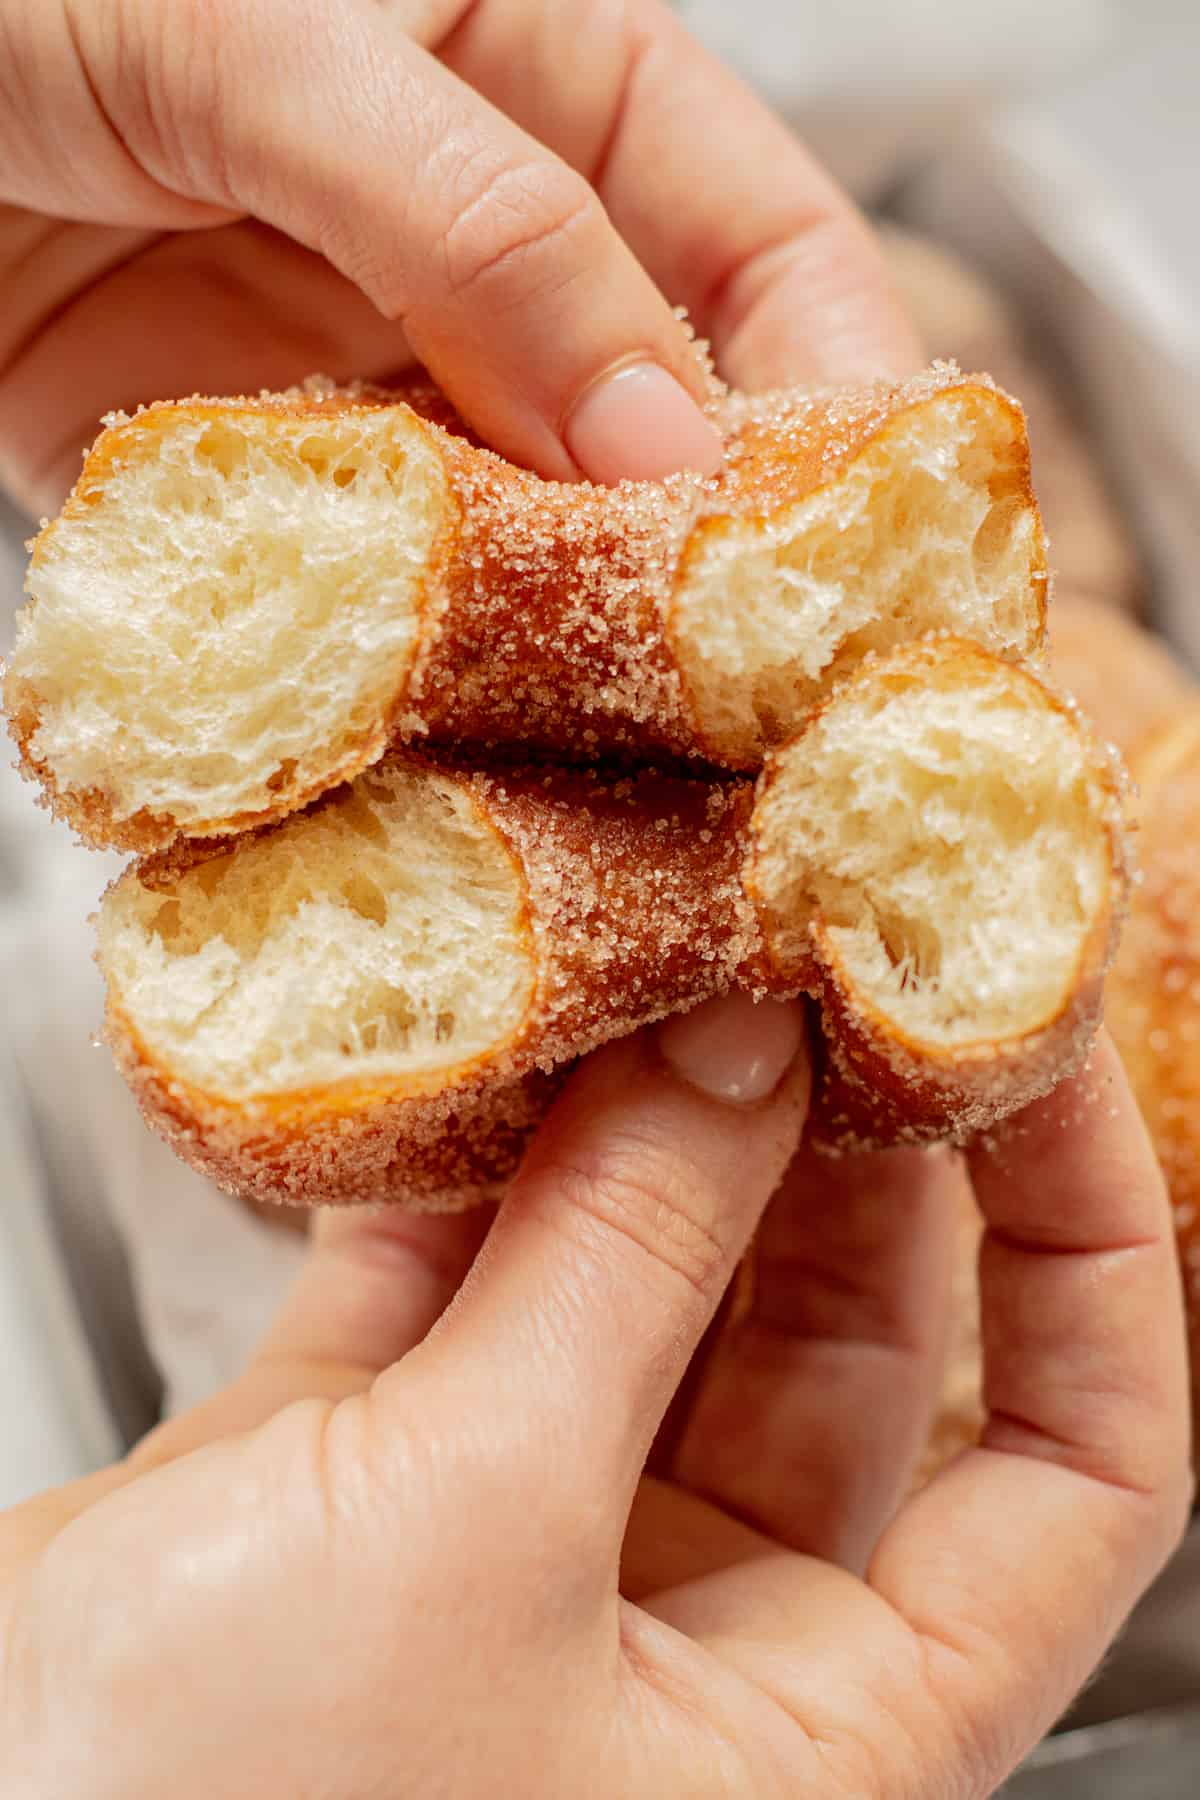
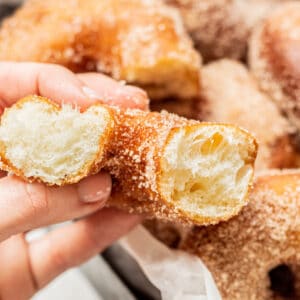
These fried buttermilk donuts are super fluffy, coated generously in cinnamon sugar or with a sweet vanilla glaze.
They are made from yeast-based, lightly enriched dough that’s easy to work with, and with great flavor. This recipe is best made over a period of two days, so the dough can proof overnight in the refrigerator for the best flavor.
Do you call them buttermilk donuts or buttermilk doughnuts? Either way, this post will show you how to make soft yeast donuts from scratch!
About these fried donuts
This homemade donut recipe is a yeast-raised donut recipe. It makes fluffy donuts that are so delicious! These are not old-fashioned cake donuts. Yeast adds a few extra steps but they are well worth it.
- Enriched dough. The soft dough is enriched with buttermilk, butter, and egg. This gives great flavor and texture. The acidity in the buttermilk helps create a more tender donut.
- Yeast-based. It’s a yeast-based dough so it’s lovely and light when fried.
- Cinnamon-sugar coating or a simple glaze. Cinnamon sugar is a classic topping and a perfect match for these donuts. If you want a sweet glaze instead, you could do a vanilla glaze or chocolate glaze too. Or, dust them in powdered sugar!
The Buttermilk
This yeast donut recipe is made with real buttermilk (make your own buttermilk or store-bought). Buttermilk is the tangy, low-fat liquid left behind after churning butter.
It is rich in flavor. The acidity in the buttermilk adds tenderness to baked goods and the tang of the buttermilk brings good flavor.
If you have no buttermilk, you can also just use whole milk.
Ingredients
Find the amounts of the simple ingredients listed for these homemade doughnuts in the printable recipe card at the bottom of this post. Here is a rundown of what you will need.
- All-purpose flour. For this recipe, all-purpose flour is used, one with a protein level of around 10-11%. This protein content is enough to develop the gluten but not too much that the fried donuts are chewy.
- Instant yeast or active dry yeast. The yeast used in this donut recipe is instant yeast. It is fast-acting and usually pretty foolproof when it comes to viability. If you are wanting to use active dried yeast, test and proof the yeast first by warming the buttermilk (to around 95-104°F / 35-40°C) and mixing in the yeast along with the sugar. When the buttermilk gets heated it will appear curdled but that’s not a problem. Leave it to sit for 5 minutes until foamy before continuing the recipe.
- Granulated white sugar. For in the dough and the cinnamon sugar topping
- Melted butter
- Buttermilk or whole milk
- A whole egg
- Vanilla extract or paste
- Salt
- Vegetable oil. A neutral type like canola oil or sunflower oil, with a high smoke point, for frying
- Ground cinnamon. For topping.
- Glaze ingredients (optional). If opting for a glaze instead you will need powdered sugar, vanilla extract, and a little milk.

Equipment
- Stand mixer. The dough is easiest to make in the bowl of a stand mixer fitted with a dough hook attachment. However, it can be made by hand too.
- Donut cutter. The donut shapes used are up to you. You can buy a special donut cutter, biscuit cutters, a large mason jar band or similar, and a really small jar lid or band for the middle hole. You can also just cut big donut circles without a middle hole. These will take a little longer to cook. See these lemon curd donuts for example.
- A deep fryer or large pot and candy thermometer. For deep frying the donuts. If you’re not using a deep fryer (which usually comes with a thermometer) you’ll need a candy thermometer for this. One that can handle reading at a high temperature.
Method
The yeasted dough
In a bowl of your stand mixer fitted with a dough hook, combine all the donut dough ingredients. Turn the mixer on low speed and combine until it forms a thick but slightly sticky dough. Once combined, keep mixing on medium speed for around 8-10 minutes until the dough is smooth, glossy, and elastic.
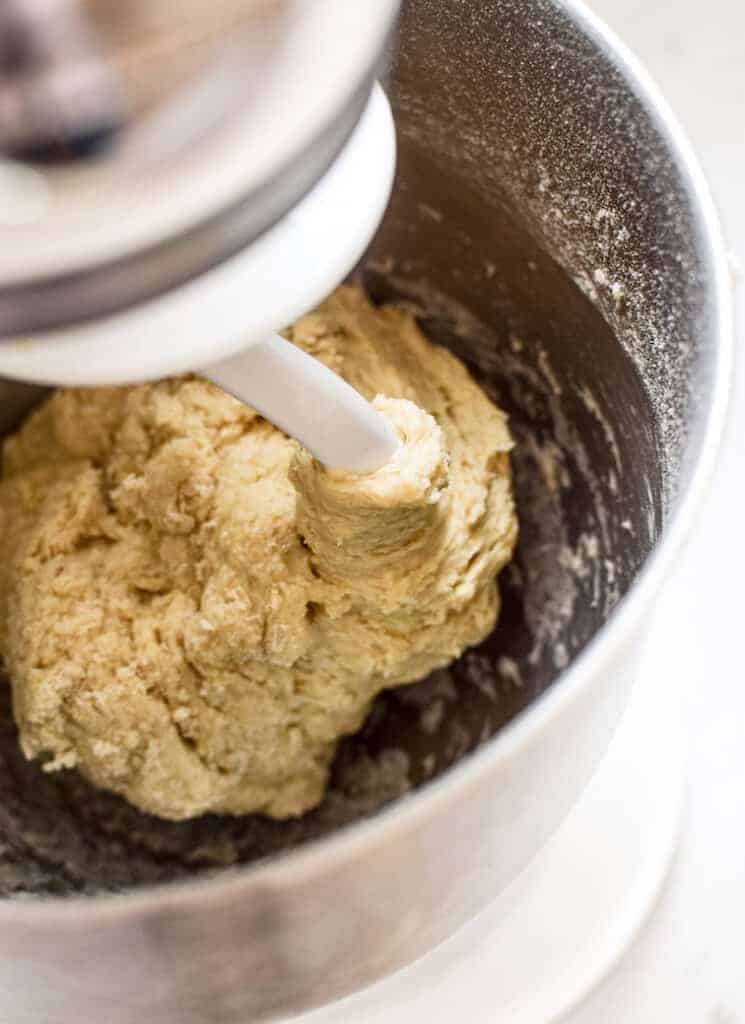
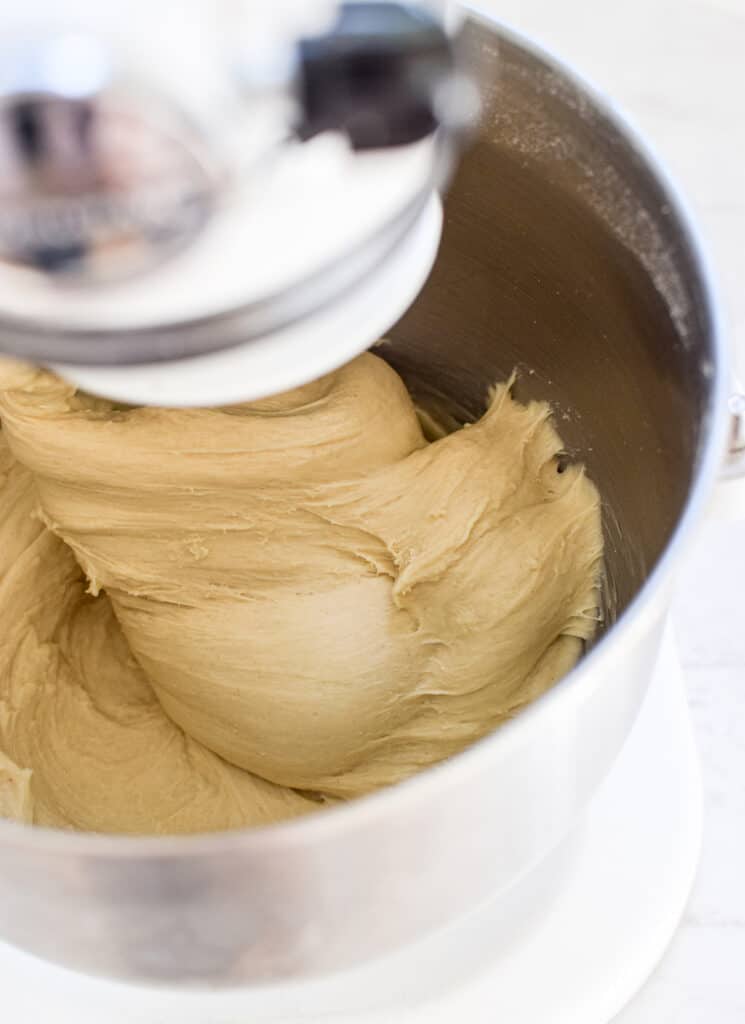
Kneading by hand – Use a wooden spoon or fork and mix all the dough ingredients in a medium bowl until they form a shaggy dough ball. Once it forms a dough ball, pull it onto a lightly floured surface and knead by hand for around 10-15 minutes until it becomes a strong and smooth dough. If you need a break, take it. The dough responds well to resting time.
Place the dough ball in a lightly greased bowl. Cover the bowl with plastic wrap or a lid and place it in the refrigerator for anywhere between 4 and 24 hours. The longer it’s left, the more flavor in the donuts.
If you want to skip the cold proof and make these donuts fast, let the dough double at room temperature instead (around 1- 1 1/2 hours). Then continue with the shaping.
Shaping
Punch down the dough and pull it from the bowl onto a floured work surface or on parchment paper.
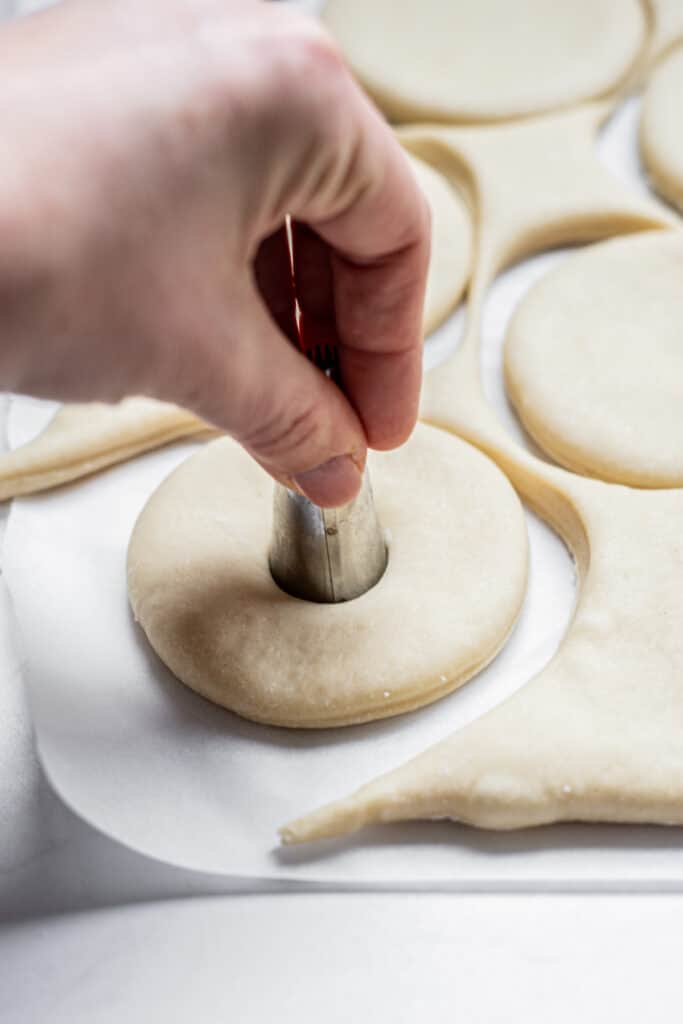
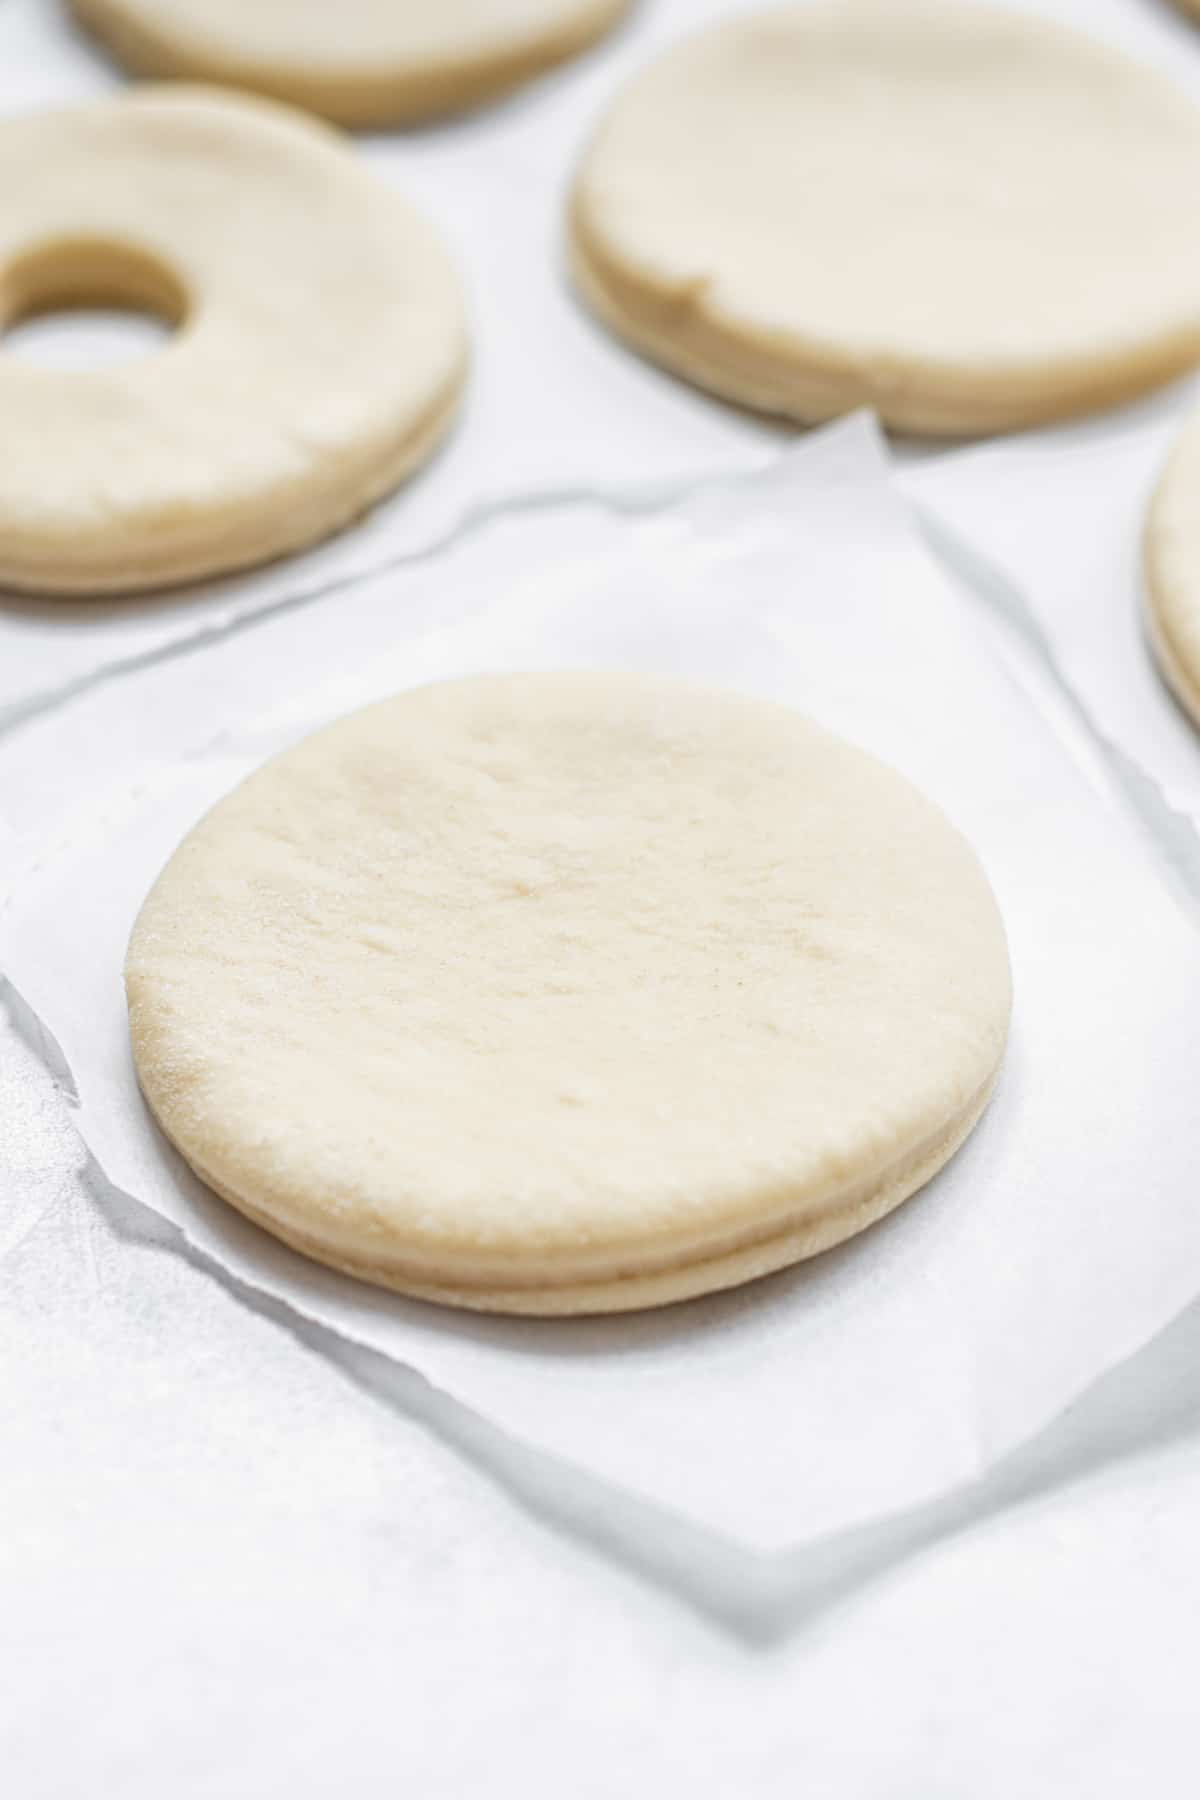
Using a rolling pin, roll the dough into a ½ inch / 1.3cm thick square. Use a doughnut cutter, cookie cutter, or a jar lid or glass to cut out the donuts.
Place the cut donut rings and the donut holes on parchment paper. Use kitchen scissors to cut around each donut on the parchment paper so each donut is sitting on an individual piece of parchment.
The donuts can be transported into the oil on parchment paper, which makes transferring them easier. If you don’t have parchment paper, you can transfer the donuts without it but it can be a little trickier as the dough is quite soft.
Any remaining dough can be rolled out and cut again.
Bombolini-style donuts
You can also simply cut them as circles and use a large jar lid or cookie cutter to cut circles of 3.5 inches/9 cm diameter, without a donut hole in the middle.
These will be cooked slightly longer and at a lower temperature than donuts with a donut hole removed from the middle.
Second rise
Leave the donuts to slightly rise for around 35-40 minutes until they have puffed out a bit. This timing is dependent on room temperature – the warmer the room, the faster they’ll rise.

Frying
When the donuts have risen, pour the frying oil into a deep fryer or a deep pot and heat it to 356°F/180°C. The oil in the pan should be at least 3 inches of oil deep.
Note- if your donuts were cut without a donut hole (bomboloni-style), the temperature of your oil should be less hot, around 340°F / 171°C as they will take longer to cook in the middle so you don’t want them going brown too fast on the outside.
When the oil is at temperature, fry the donuts, only 2-3 at a time in the hot oil. Use tongs to remove the pieces of parchment paper from the oil.
Don’t add too many at a time because they will lower the oil temperature. If it drops too much your donuts won’t fry well and will absorb too much oil. Don’t let the temperature surpass 375°F/190°C.
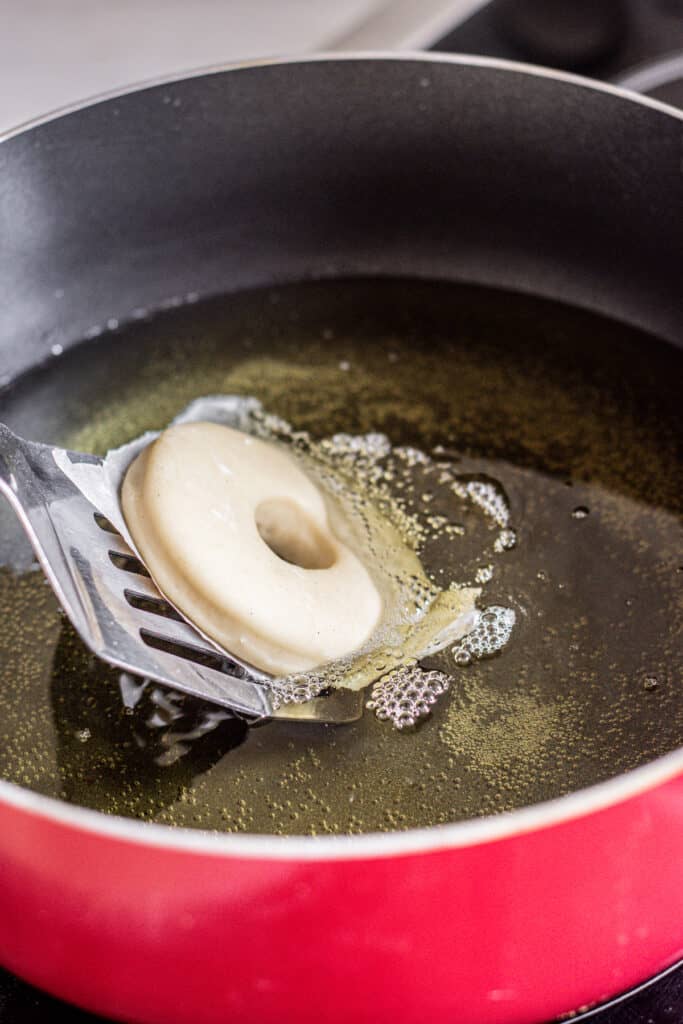

Fry the donuts for around 45 seconds on each side, so each side is a deep golden brown. It will be much less for the small donut holes. Bomboloni-style donuts will need around 2 minutes on each side, at 340°F / 171°C.
After frying, use a slotted spoon to remove the fried dough from the oil.
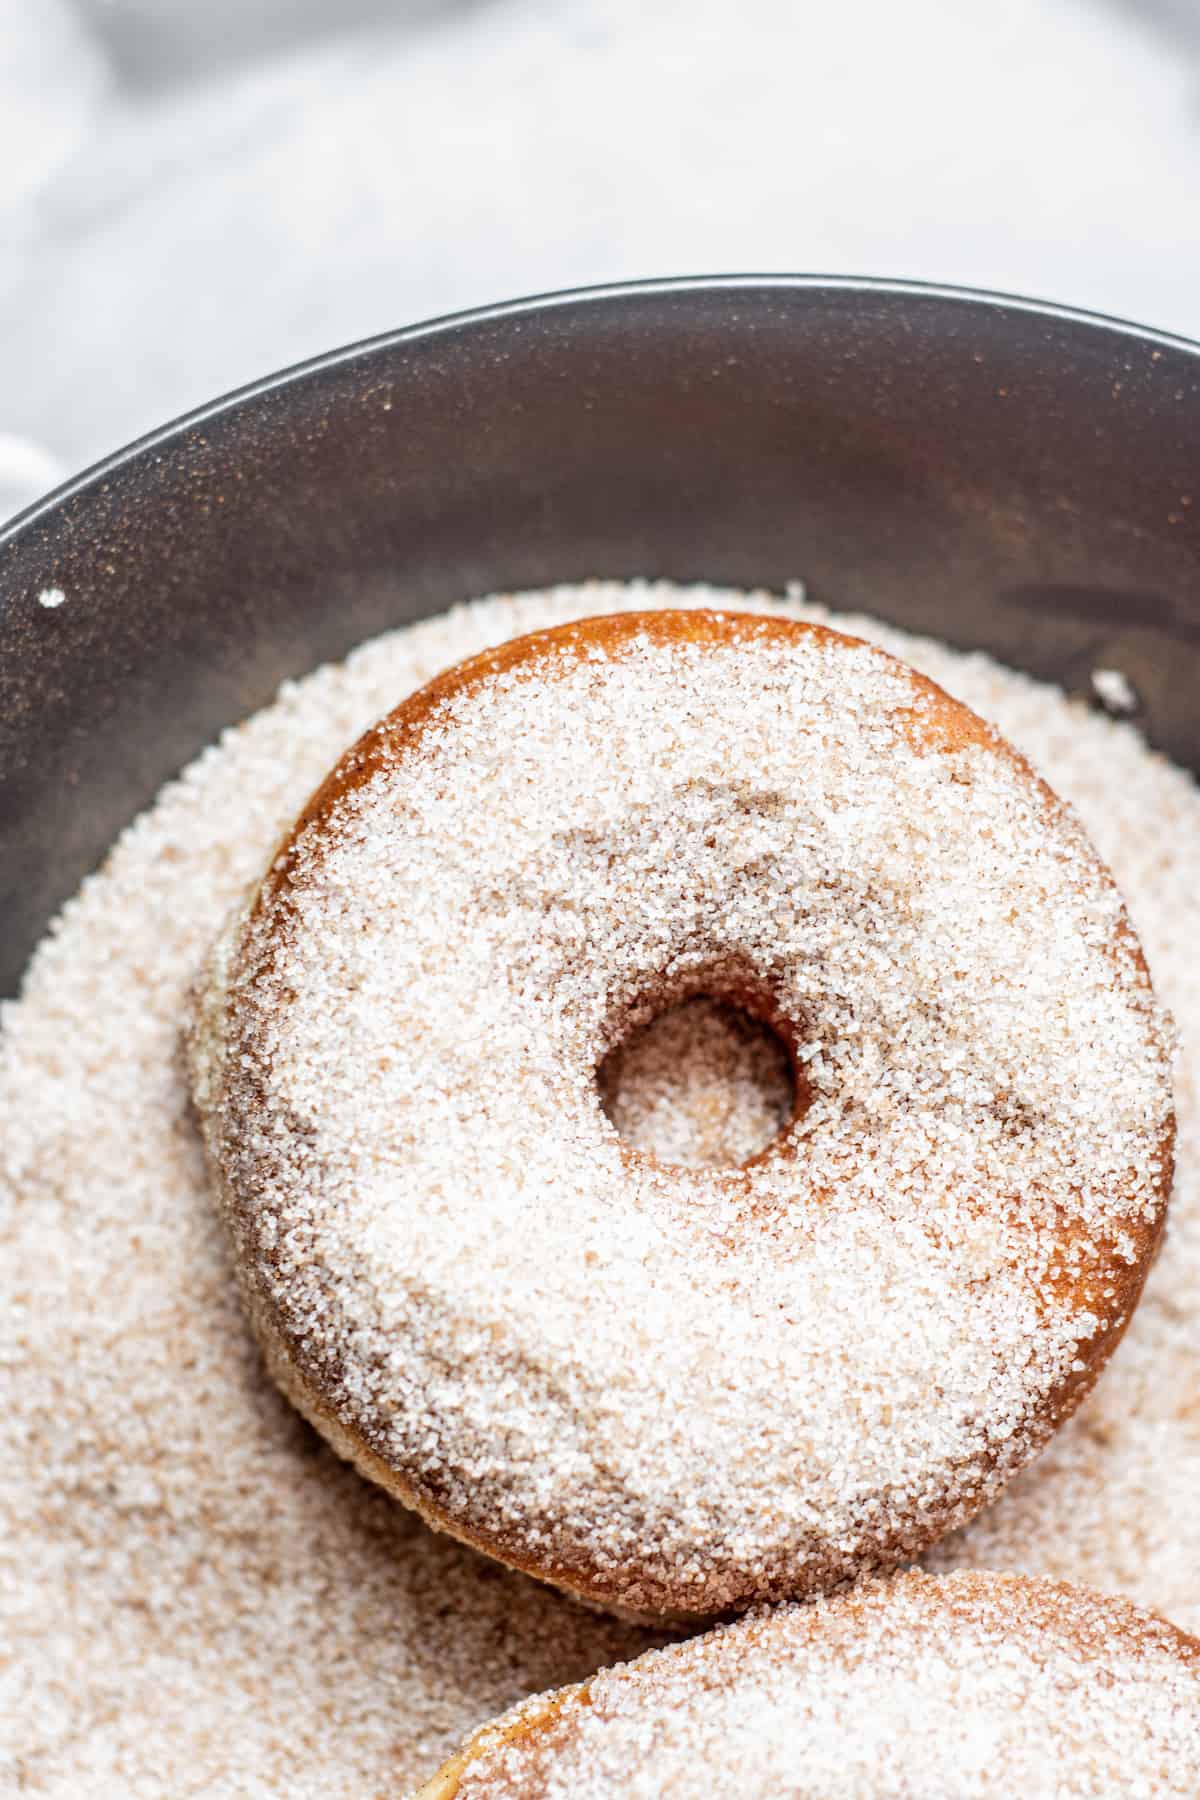
Coating in cinnamon sugar.
If coating the donuts in cinnamon sugar, while the donuts are frying, mix together cinnamon and sugar in a small bowl.
Place the hot donuts into the sugar mixture as they come from the hot oil. Use tongs or two forks to flip the donuts in the sugar to coat them on all sides.
Place the coated donuts on a wire rack, then repeat the process with the remaining donuts.
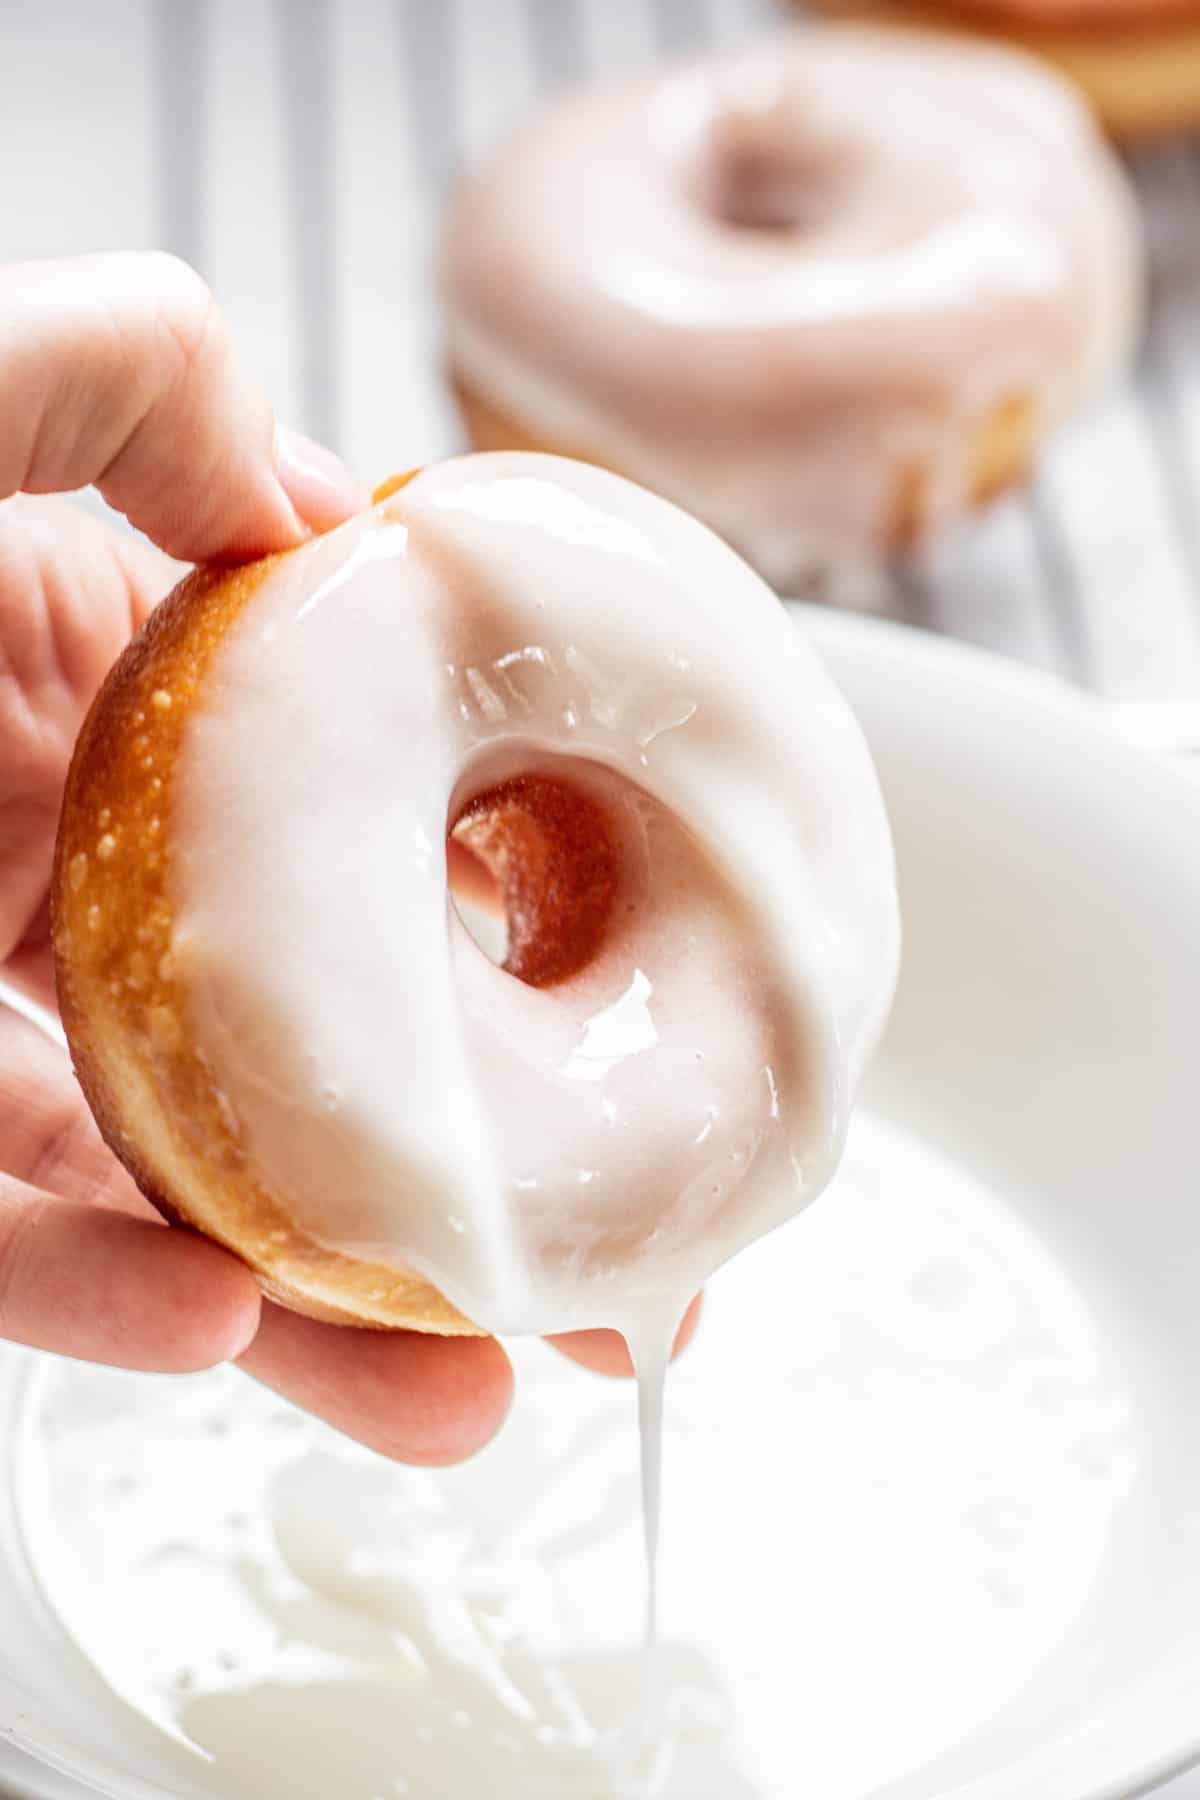
Donut glaze
For a simple vanilla glaze instead, combine powdered sugar, vanilla, and milk. When the donuts come from the oil, place them on paper towels to soak up some of the extra oil.
Let the donuts cool on a cooling rack for 5 minutes, then dip the still-warm donuts into the glaze.
Serving and storing
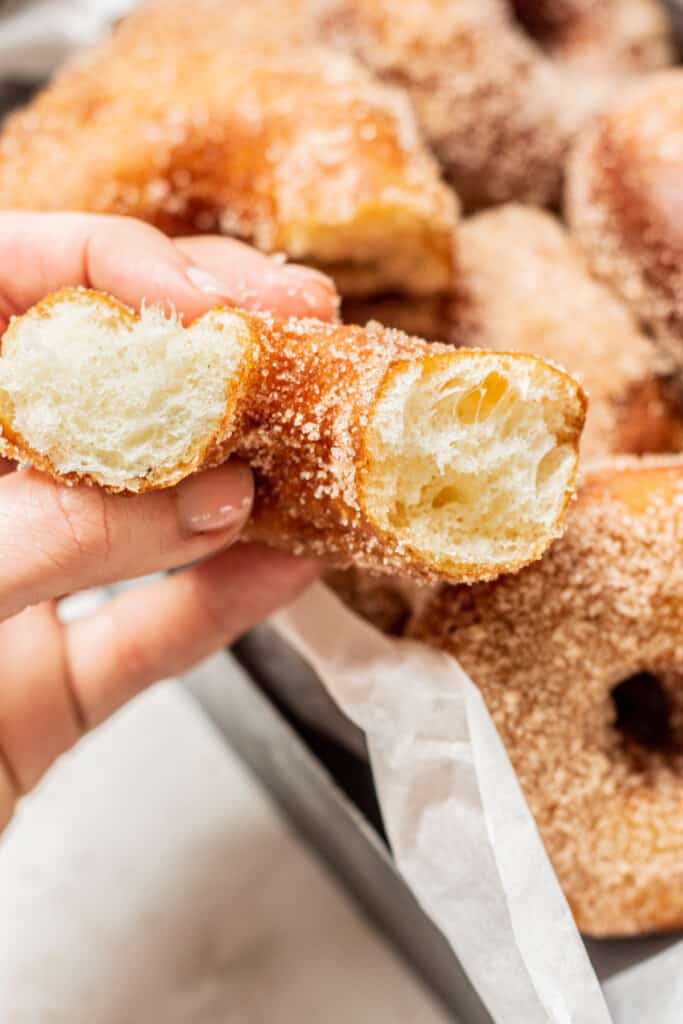
For ultimate fluffy buttermilk donuts, they are best enjoyed on the day they are fried. They’re delicious alongside coffee or a cold glass of milk.
If you made bomboloni-style donuts, they are best when filled. You can fill them with lemon curd, caramel sauce, or vanilla pastry cream, or make jelly brioche donuts and fill them with blueberry filling, raspberry compote or strawberry compote. These caramel donuts use a whipped caramel filling!
Leftover donuts can be stored once cooled in an airtight container at room temperature for up to 2 days.
Fried Buttermilk Donuts
Equipment
Ingredients
Donut Dough
- 1 ½ teaspoons instant yeast or active dried yeast
- 25 g granulated sugar
- 230 g buttermilk or use whole milk, lukewarm
- 405 g all-purpose flour
- 42 g unsalted butter melted
- 1 large egg
- 1 tsp vanilla extract
- 1/2 teaspoon salt
Frying
- 1-2 quarts neutral oil – enough to fill the pot around 3″ deep.
Cinnamon topping (option 1)
- 200 g granulated sugar
- 2 tsp ground cinnamon
Vanilla glaze (option 2)
- 120 g powdered sugar
- 3-4 Tablespoons milk
- 1 teaspoon vanilla extract
Instructions
- In a bowl of a stand mixer fitted with a dough hook, combine all the donut dough ingredients. Turn the mixer on low and combine until it forms a thick but slightly sticky dough. Once combined, keep mixing on medium speed for around 8-10 minutes until the dough is smooth, glossy, and elastic.
- Kneading by hand – Use a wooden spoon or fork and mix all the dough ingredients in a medium bowl until they form a shaggy dough ball. Once it forms a dough ball, pull it onto a floured surface and knead by hand for around 10-15 minutes until it becomes a strong and smooth dough. If you need a break, take it. The dough responds well to resting time.
- Place the dough ball in a lightly greased large bowl. Cover the bowl with plastic wrap or a lid and place it in the refrigerator for anywhere between 4 and 24 hours. The longer it’s left, the more flavor in the donuts. If you want to skip the cold proof and make these donuts fast, let the dough double at room temperature instead (around 1- 1 1/2 hours). Then continue with the shaping.
- Punch down the dough and pull it from the bowl onto a floured work surface or on parchment paper.
- Using a rolling pin, roll the dough into a ½ inch / 1.3cm thick square. Use a doughnut cutter, cookie cutter, or a jar lid or glass to cut out the donuts.
- Place the cut donut rings and the donut holes on parchment paper. Use kitchen scissors to cut around each donut on the parchment paper so each donut is sitting on an individual piece of parchment.
- The donuts can be transported into the oil on parchment paper, which makes transferring them easier. If you don't have parchment paper, you can transfer the donuts without it.
- Any remaining dough can be rolled out and cut again. Bombolini-style donuts – You can also simply cut them as circles and use a large jar lid or cookie cutter to cut circles of 3.5 inches/9 cm diameter, without a donut hole in the middle. These will be cooked slightly longer and at a lower temperature than donuts with a donut hole removed from the middle.
- Leave the donuts to slightly rise for around 30-45 minutes until they have puffed a bit. This timing is dependent on room temperature – the warmer the room, the faster they’ll rise.
- When the donuts have risen, pour the frying oil into a deep fryer or a deep pot and heat it to 356°F/180°C. The oil in the pan should be at least 3 inches deep. Note- if your donuts were cut without a donut hole (bomboloni-style), your oil should be less hot, 340°F / 171°C as they will take longer to cook in the middle so you don't want them going brown too fast on the outside.
- If using a cinnamon topping, combine the granulated sugar and cinnamon in a small bowl and set it aside.
- When the oil is at temperature, fry the donuts, only 2-3 at a time in the hot oil. Use tongs to remove the pieces of parchment paper from the oil.
- Don't add too many at a time because they will lower the oil temperature. If it drops too much your donuts won't fry well and will absorb too much oil. Don't let the temperature surpass 375°F / 190C.
- Fry the donuts for around 45-60 seconds on each side, so each side is a deep golden brown. It will be much less for the smaller donut holes. Bomboloni-style donuts will need around 2 minutes on each side.
- After frying, use a slotted spoon to remove the donuts from the oil, then place them while hot, into the sugar bowl. Use tongs or two forks to flip the donuts in the sugar to coat them on all sides. Place the coated donuts on a wire rack, then repeat the process with the remaining donuts.
- If you are glazing the donuts, in a bowl, combine powdered sugar, vanilla, and enough to create a thick but pourable glaze. When the donuts come from the oil, place them on paper towels to soak up excess oil. Let the donuts cool on a cooling rack for 5 minutes, then dip the still-warm donuts into the glaze. Let them dry on the rack.