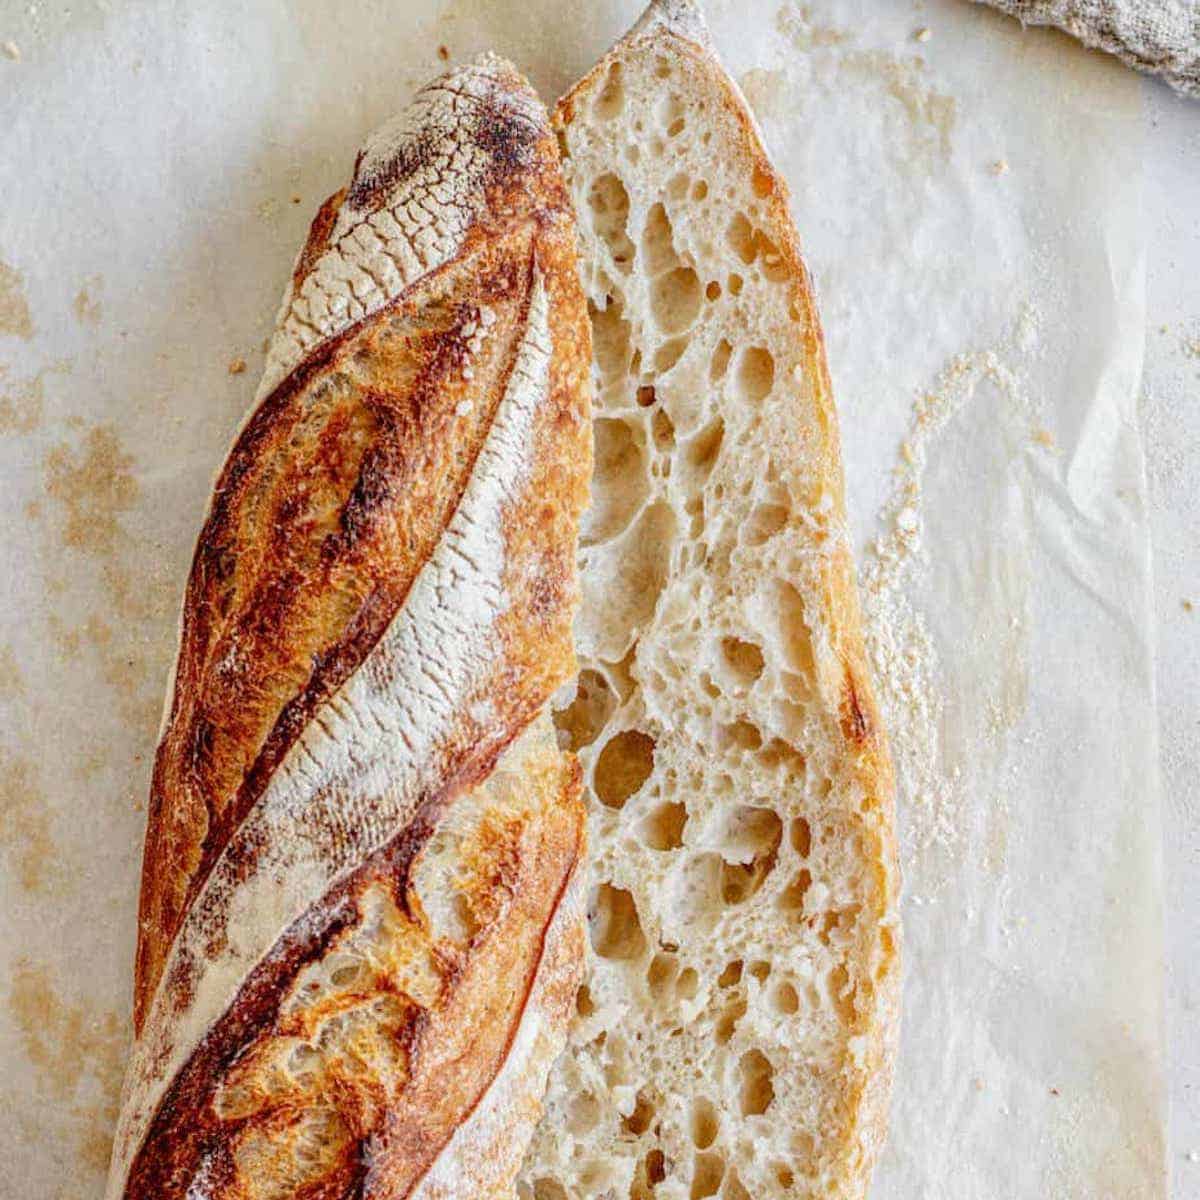
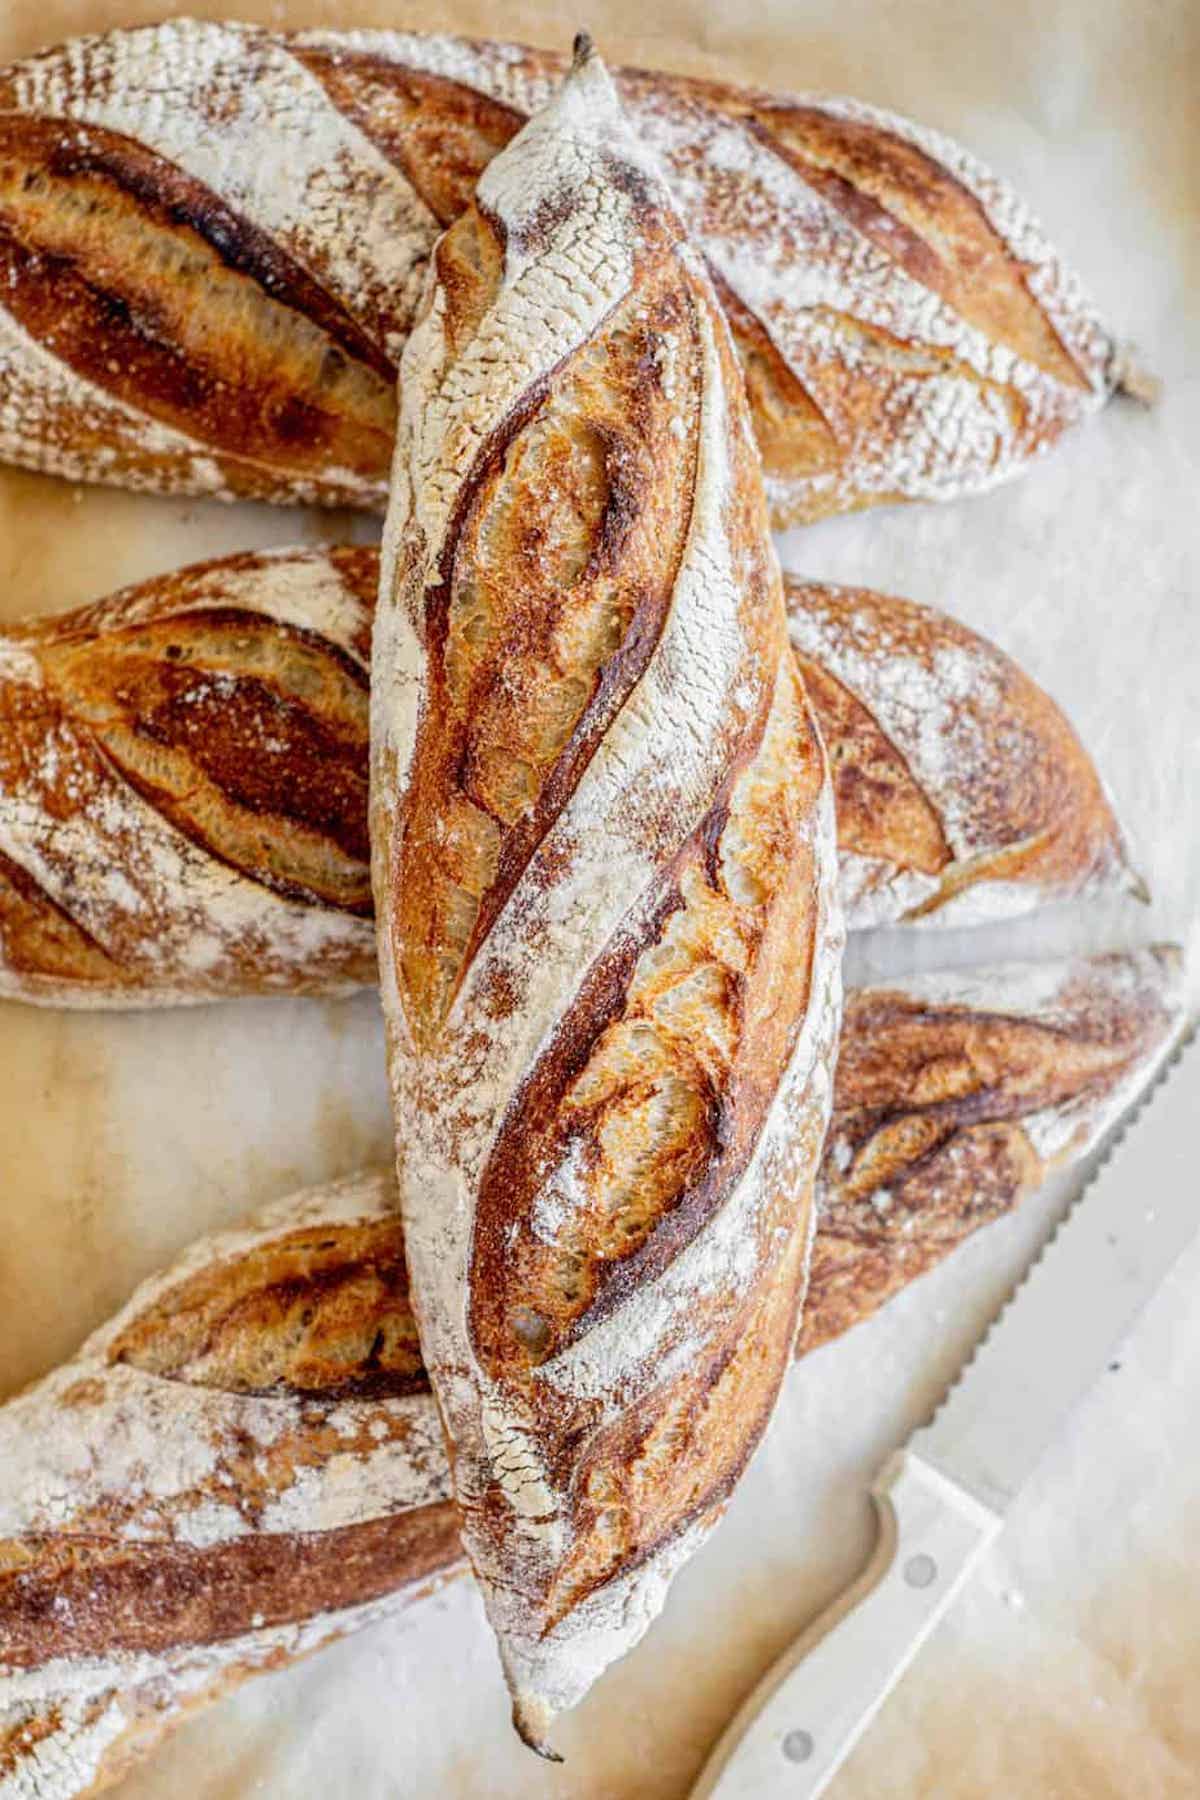
Step-by-Step Sourdough Baguette Recipe
There is something so wonderful about sourdough baguettes. With their abundance of crunchy crust, they are teamed with an airy, light, and chewy interior.
Reader Paula says:
Absolutely perfect recipe. I’ve baked these twice, and followed the recipe exactly. The baguettes were beautifully formed, airy, crusty and delicious. Thank you.
Making this sourdough baguette recipe is not that hard, and if you read on, you will see. This recipe for step-by-step sourdough baguettes will show you how to make these delicious French baguettes at home without commercial yeast!
The timings show a ‘range’ of time to complete these steps. They don’t have to be exact; there is flexibility. The perfect baguette needs time to proof properly so it’s light and airy inside. Then, it needs a hot oven to bake in and some steam to create that crisp crust. I create the steam in my oven using a pan of water or ice cubes.
If you love these sourdough baguettes, try this sourdough ciabatta or sourdough fougasse next!

Ingredients for crisp sourdough baguettes
Here is a rundown of what you need for these homemade sourdough baguettes. See the printable recipe card at the bottom of this post for the amounts.
- Bread flour or strong all-purpose flour (with a protein level of at least 11%)
- Active sourdough starter – Mix active starter with flour and water and create a levain. This is the name for the separate mixture of sourdough starter, where the entire thing will be used in the dough.
- Water
- Salt
Your starter needs to be in good condition to make great sourdough bread. Learn more about sourdough starter maintenance, or sourdough bread troubleshooting.

Equipment
- You will need a large mixing bowl to make the sourdough baguette dough. This recipe makes 4 crusty baguettes, so there is a lot of dough to work with.
- Kitchen towels or a couche (baguette linen.) A baguette tray is also helpful for holding the baguette shape, but you can do this with just kitchen towels.
- If you have a baking stone to bake this French bread, you can use that. Baking stones are great for heating the baguettes fast and efficiently to create a fantastic and even oven spring.

Timing
The timing for homemade sourdough baguettes can be tweaked to suit your schedule, but here is a guide.
- Between 7 am-9 am: Create your levain. The levain can sit and rise for around 4 hours.
- Between 12 pm-2 pm: Autolyze. Flour and water are mixed and left to autolyze in a warm place for about an hour, then the starter and salt are added
- Between 2 pm-7 pm: Bulk fermentation time. First, you will stretch and fold the dough for two hours every 30 minutes. After the last fold, the dough will sit for another 2-4 hours before pre-shaping until it has bulked by around 50%. As with all sourdough, this bulk ferment is very important to achieve an airy crumb, and the timing depends on room temperature.
- Between 7 pm-9 pm: Pre-shape. On a well-floured bench, split the dough into four. Shape each piece into a ball and leave them to sit for 20-30 minutes. Shape into baguettes and place the shaped baguettes in the refrigerator for a cold-proof of at least 8 hours, but up to 24.
- The next morning – Baking day.
Making Sourdough Baguettes
- Begin by making the levain. Mix starter, flour, and water and stir well until thoroughly mixed. Add it to a clean jar and cover it with a loosely balanced lid.

- Leave it to sit until it has at least doubled but not collapsed. Once your starter is well underway and at least nearly doubled, you can start the autolyze.
- Mix the main bread flour and water in a large bowl and use wet hands to combine it into a shaggy dough.
- Leave this to sit for around an hour.
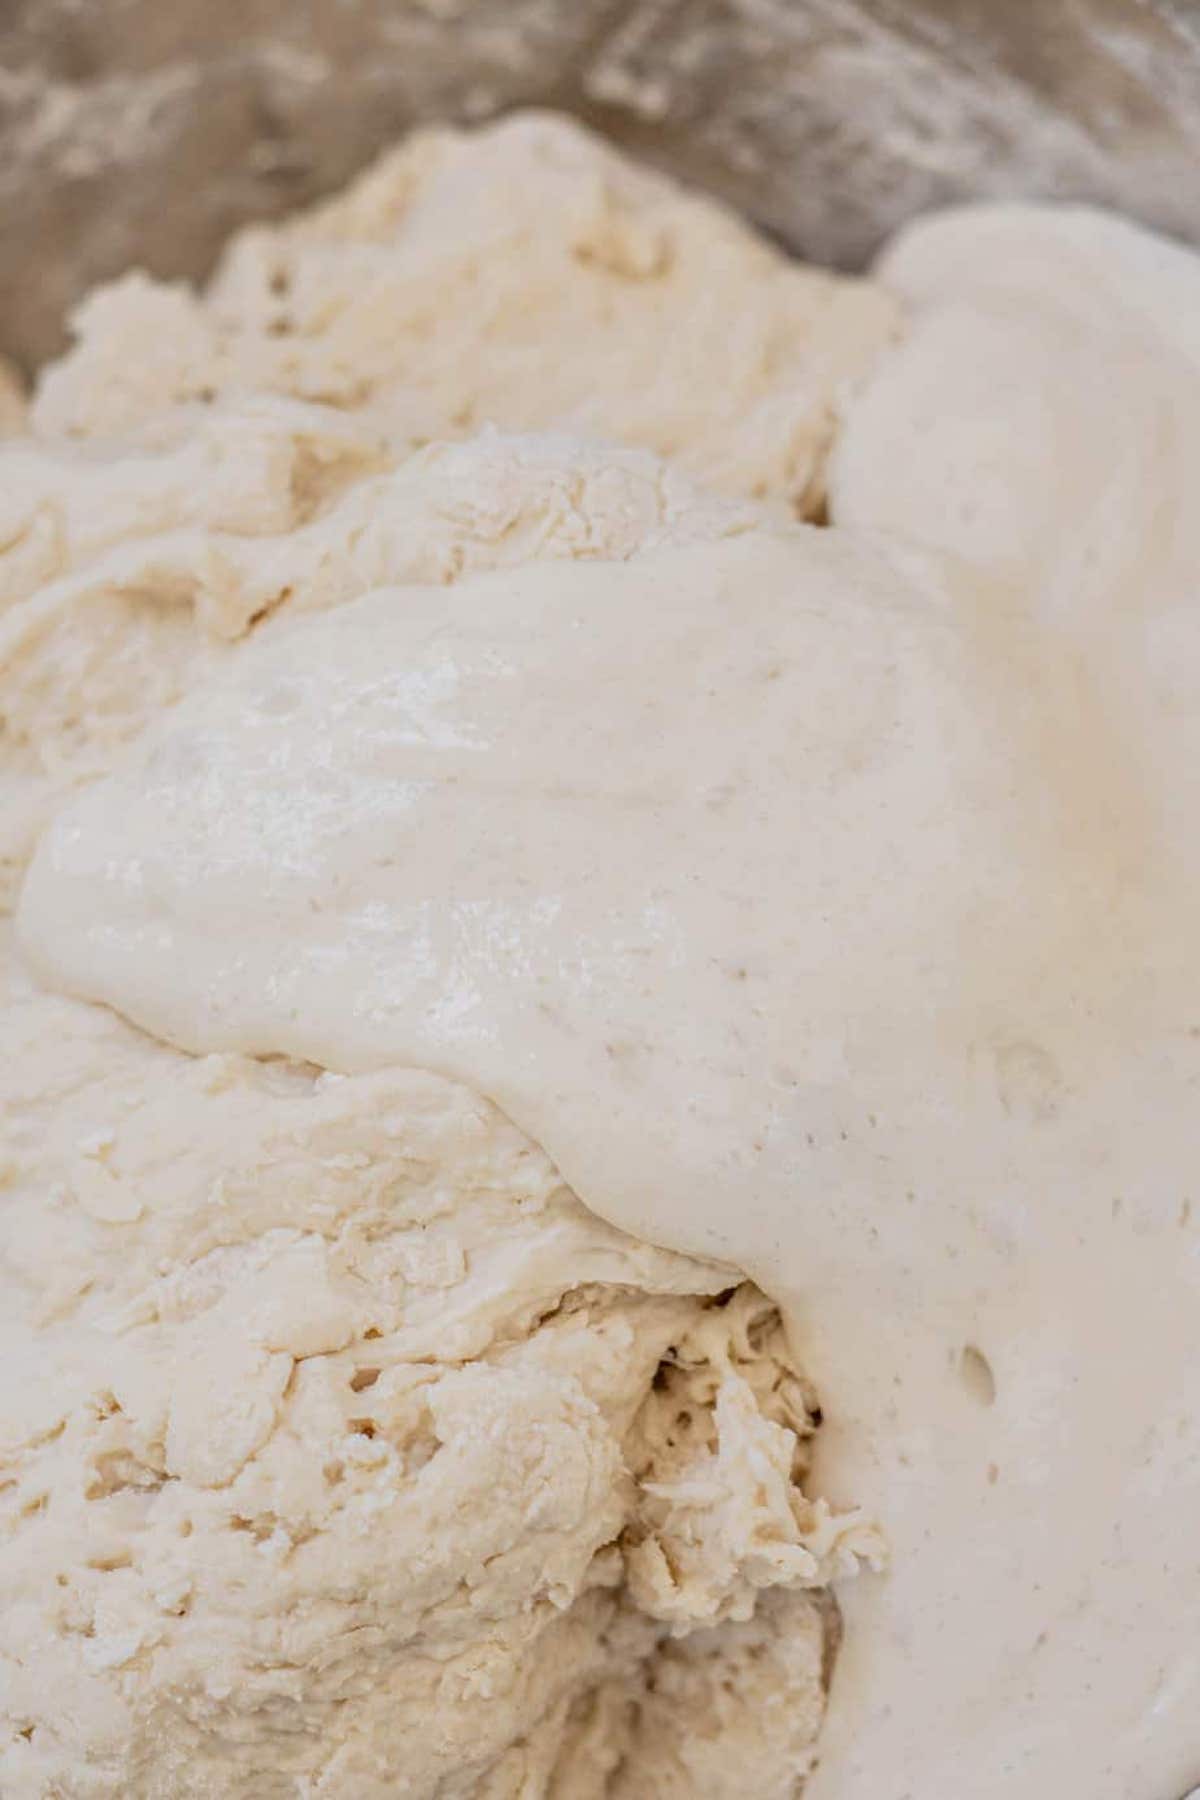
- After it has sat and the starter has doubled, add the salt and starter to the dough and mix it well with wet hands.
- This part can be sticky, but keep squishing it until the starter has been incorporated. If your mixer is large enough, you can also do this step in a stand mixer fitted with a dough hook attachment.
Stretch and folds
- After the starter has been incorporated, cover the bowl and let the dough rest for 10 minutes then perform a set of stretches and folds or coil folds.
Stretch and fold
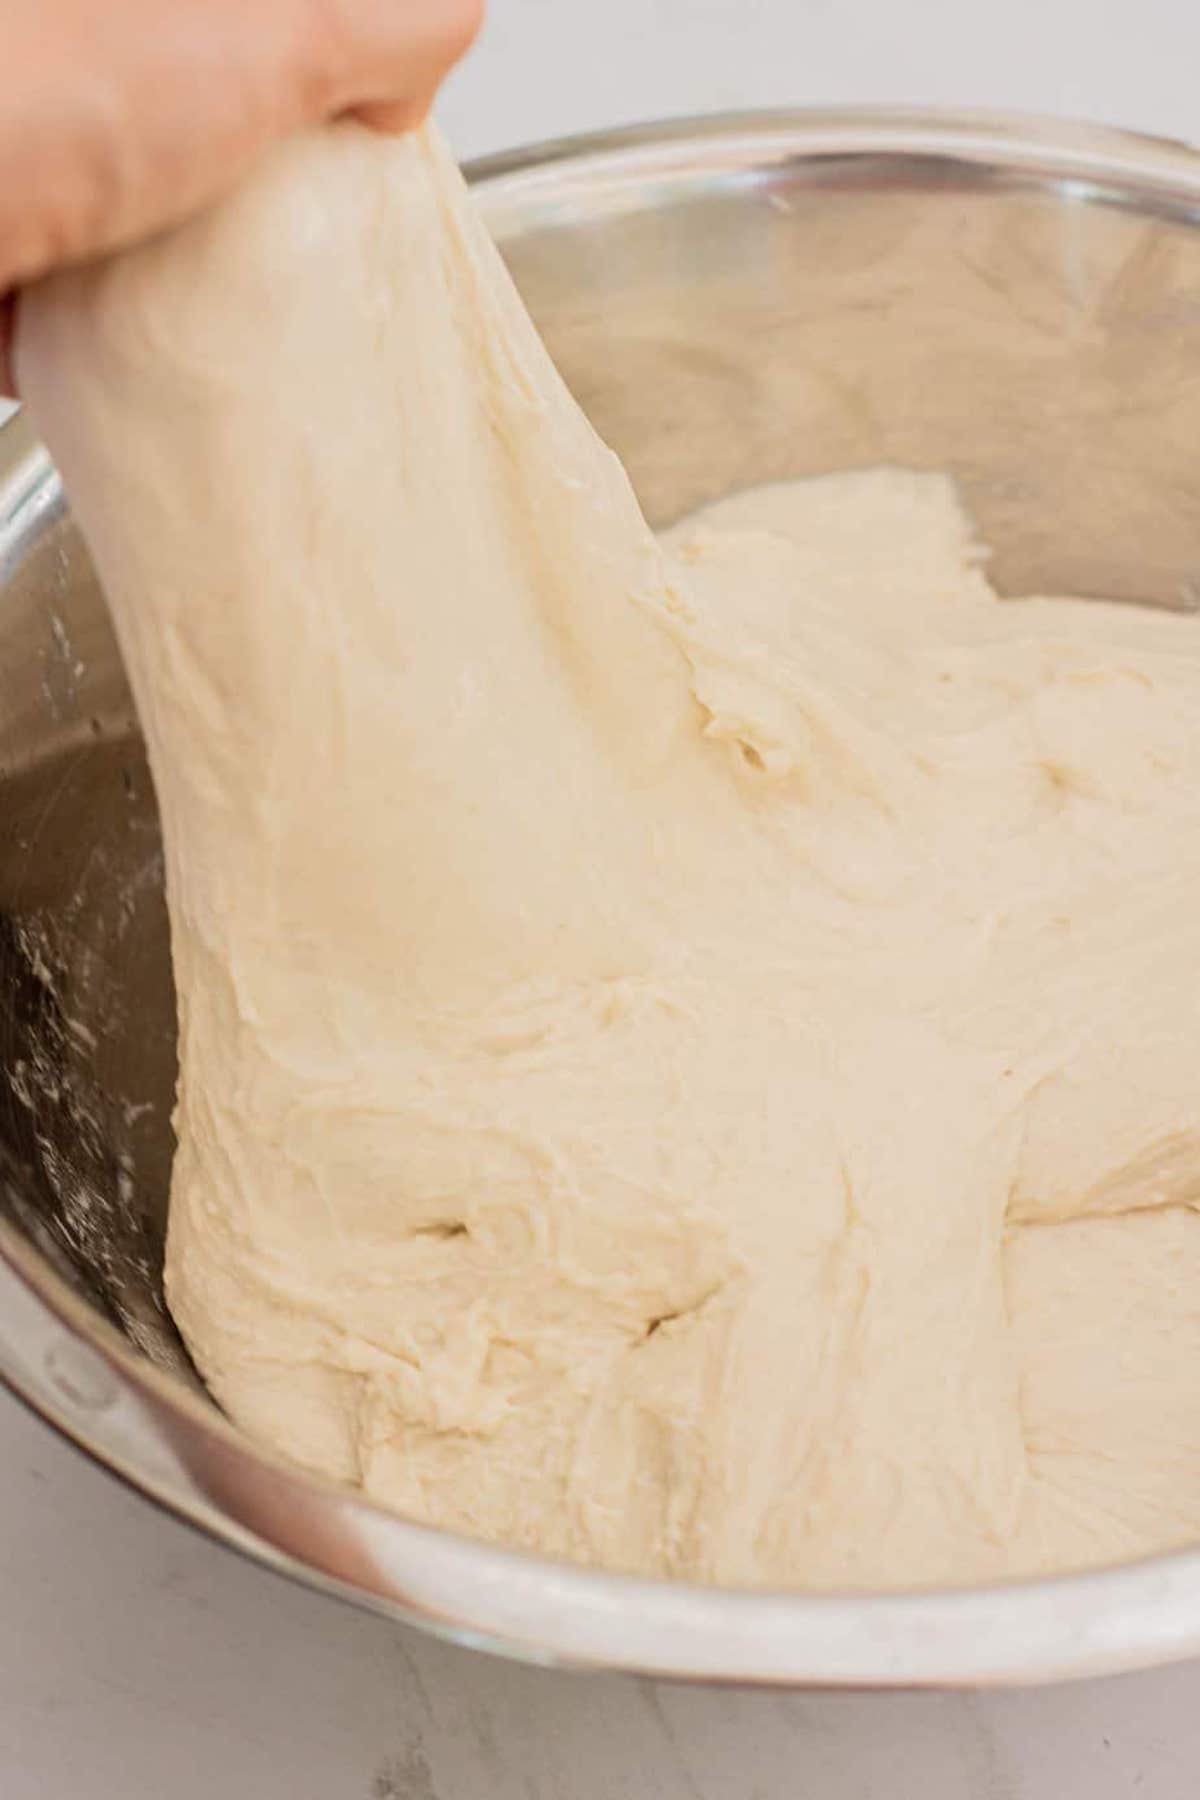
Using wet hands, take one side of the baguette dough and stretch it up, then pull it over itself. Turn the bowl a quarter turn and repeat this move. Continue stretching, folding, and turning the bowl until all sides have been folded.
That is ‘one set’ of stretch and folds.
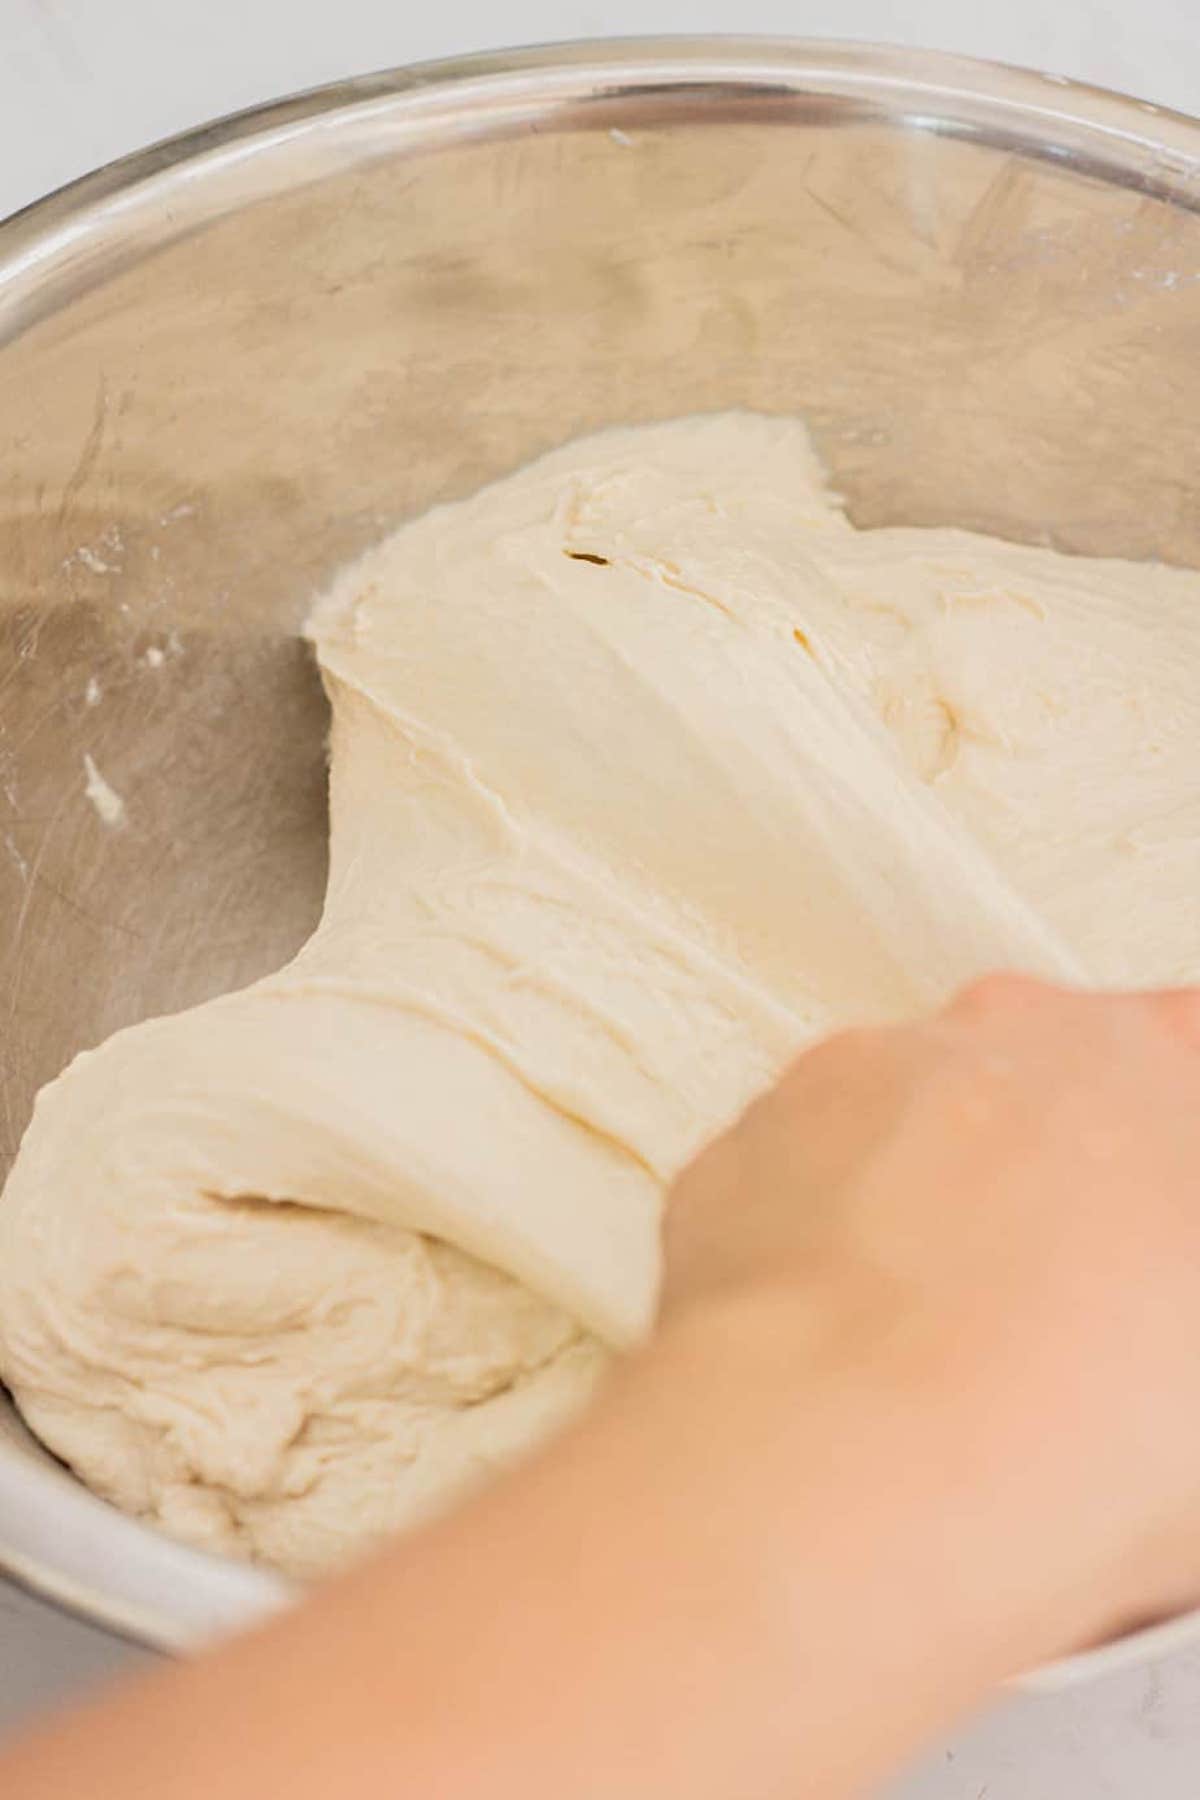
Coil fold
Coil folds are great when its a wetter dough like this baguette recipe. Using wet hands, coax the sides of the dough up with your fingers and lift it from the middle and back onto itself. Turn the dough and repeat on all sides until it forms a ball. If the dough sticks too much to your hands, wet them again. See coil folding in action.
- Perform 4 more sets of folds over the next 2 hours, one every 30 minutes.
- After this, cover the bowl and let it ferment in a warm place, ideally around 77°F /25°C for 2-4 hours until it shows clear signs of fermentation and bulks by around 50%. This timing will significantly depend on your room temperature.
Pre-shape
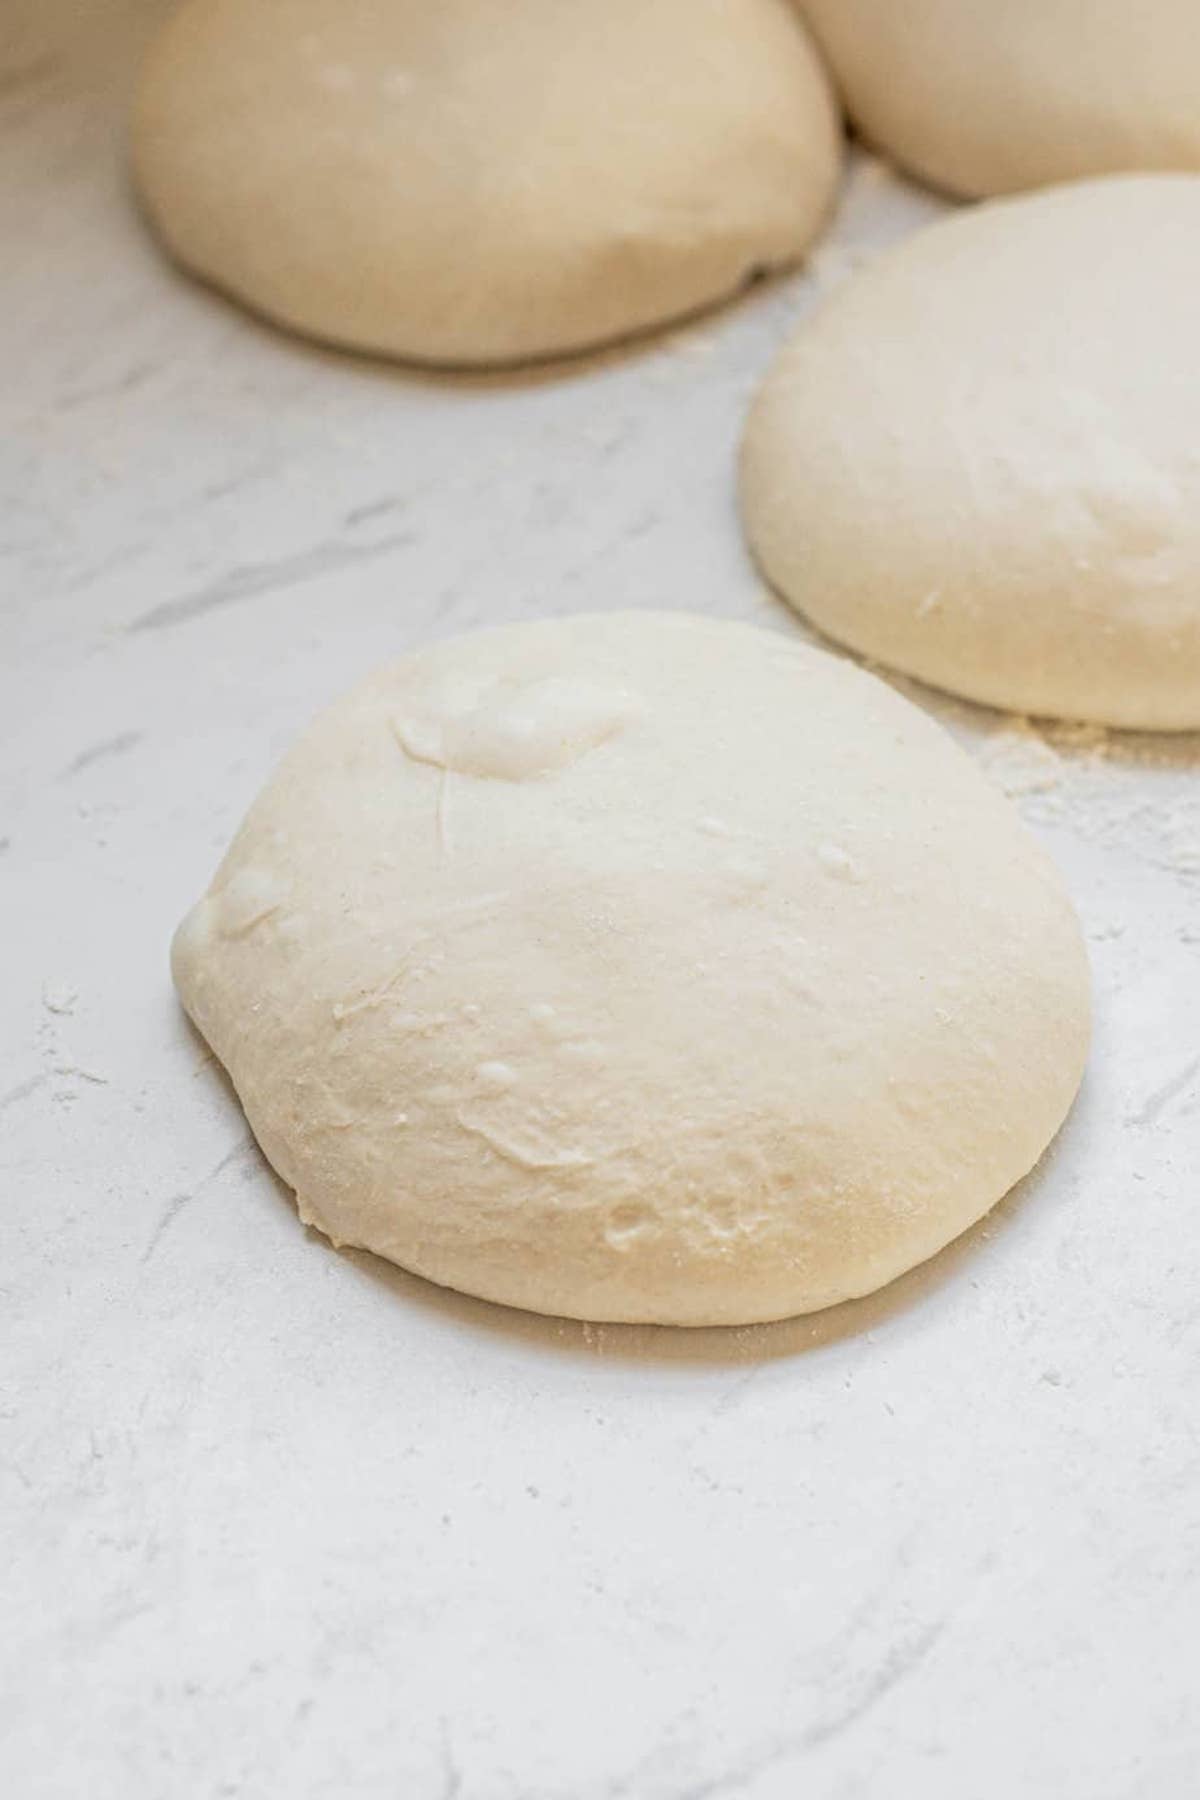
- Gently tip the dough from the tray onto a lightly floured work surface and cut it into 4 even pieces. Use a kitchen scale to weigh the dough first to get them extra even.
- Take a piece of dough and form it into a square. Take each of the square’s four corners and bring them, one by one, into the middle to create a little parcel. Flip this parcel upside down, so it’s seam side down, and then cup this gently in between your hands and rotate it around and around on the bench to form a ball.
- Leave the balls on a floured bench, covered with a tea towel for 20-30 minutes until slightly puffed, and pass the poke test. Use a finger to poke the dough. If it pops back out slowly and leaves a slight indentation, then it’s ready. This may take longer if your room is colder.
Final Shaping
- Place a dough ball seam-side up on a floured work surface. Gently stretch it into a horizontal rectangle.
- Take the top third of the dough and fold it down to meet the middle. Use your fingers to push it down and seal it together. Rotate the dough 180 degrees, and do the same to the top third of the dough.

- Fold over the top layer again with your left hand, but in small increments, starting at the top right corner.
- For each bit, you fold down, use the heel of your hand to push it in, and elongate the dough. Lengthen them to around 12 inches/ 30 cm.
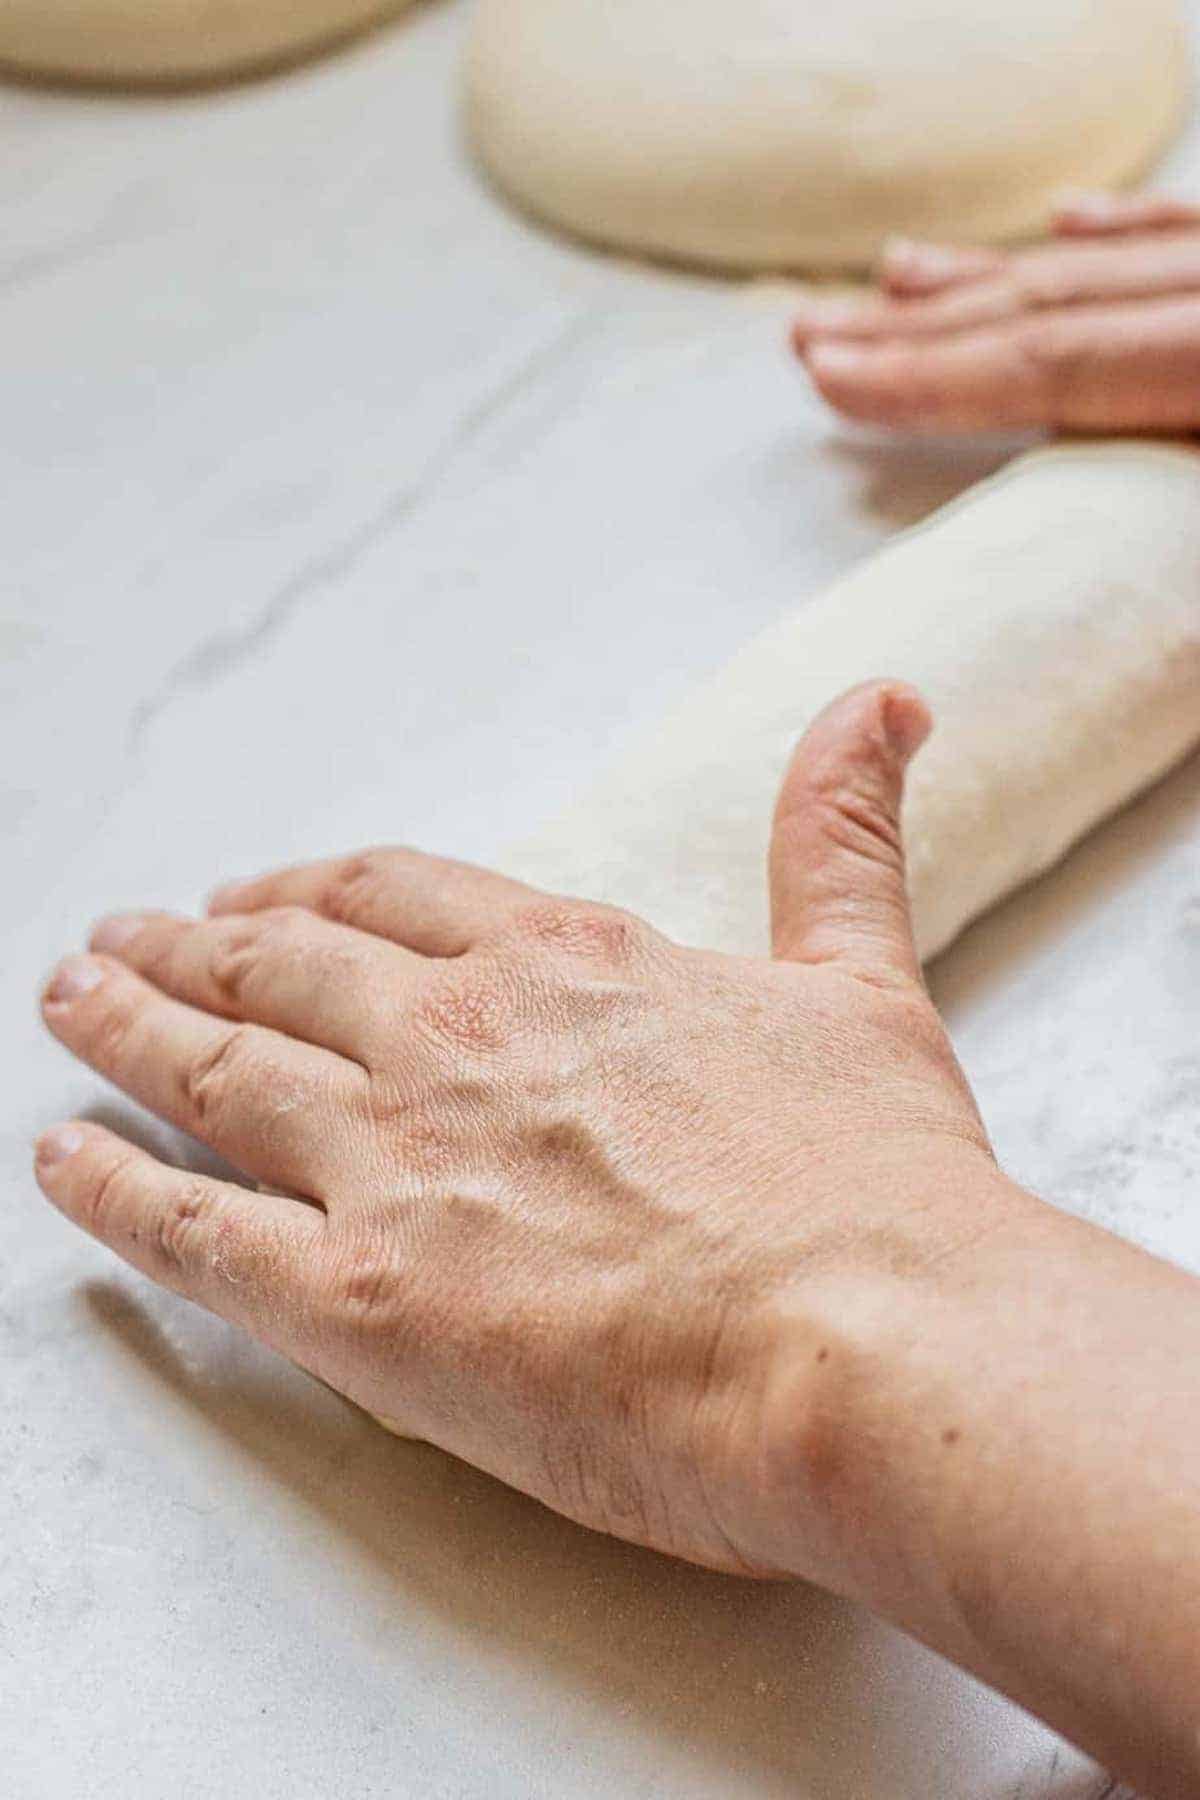
- Start rolling it on the bench to lengthen it, tapering off at the ends to get that traditional baguette tip.
- It’s helpful to brush some of the flour away before this step of the shaping, as the baguettes will need to grip the bench a little bit to create surface tension in the roll.
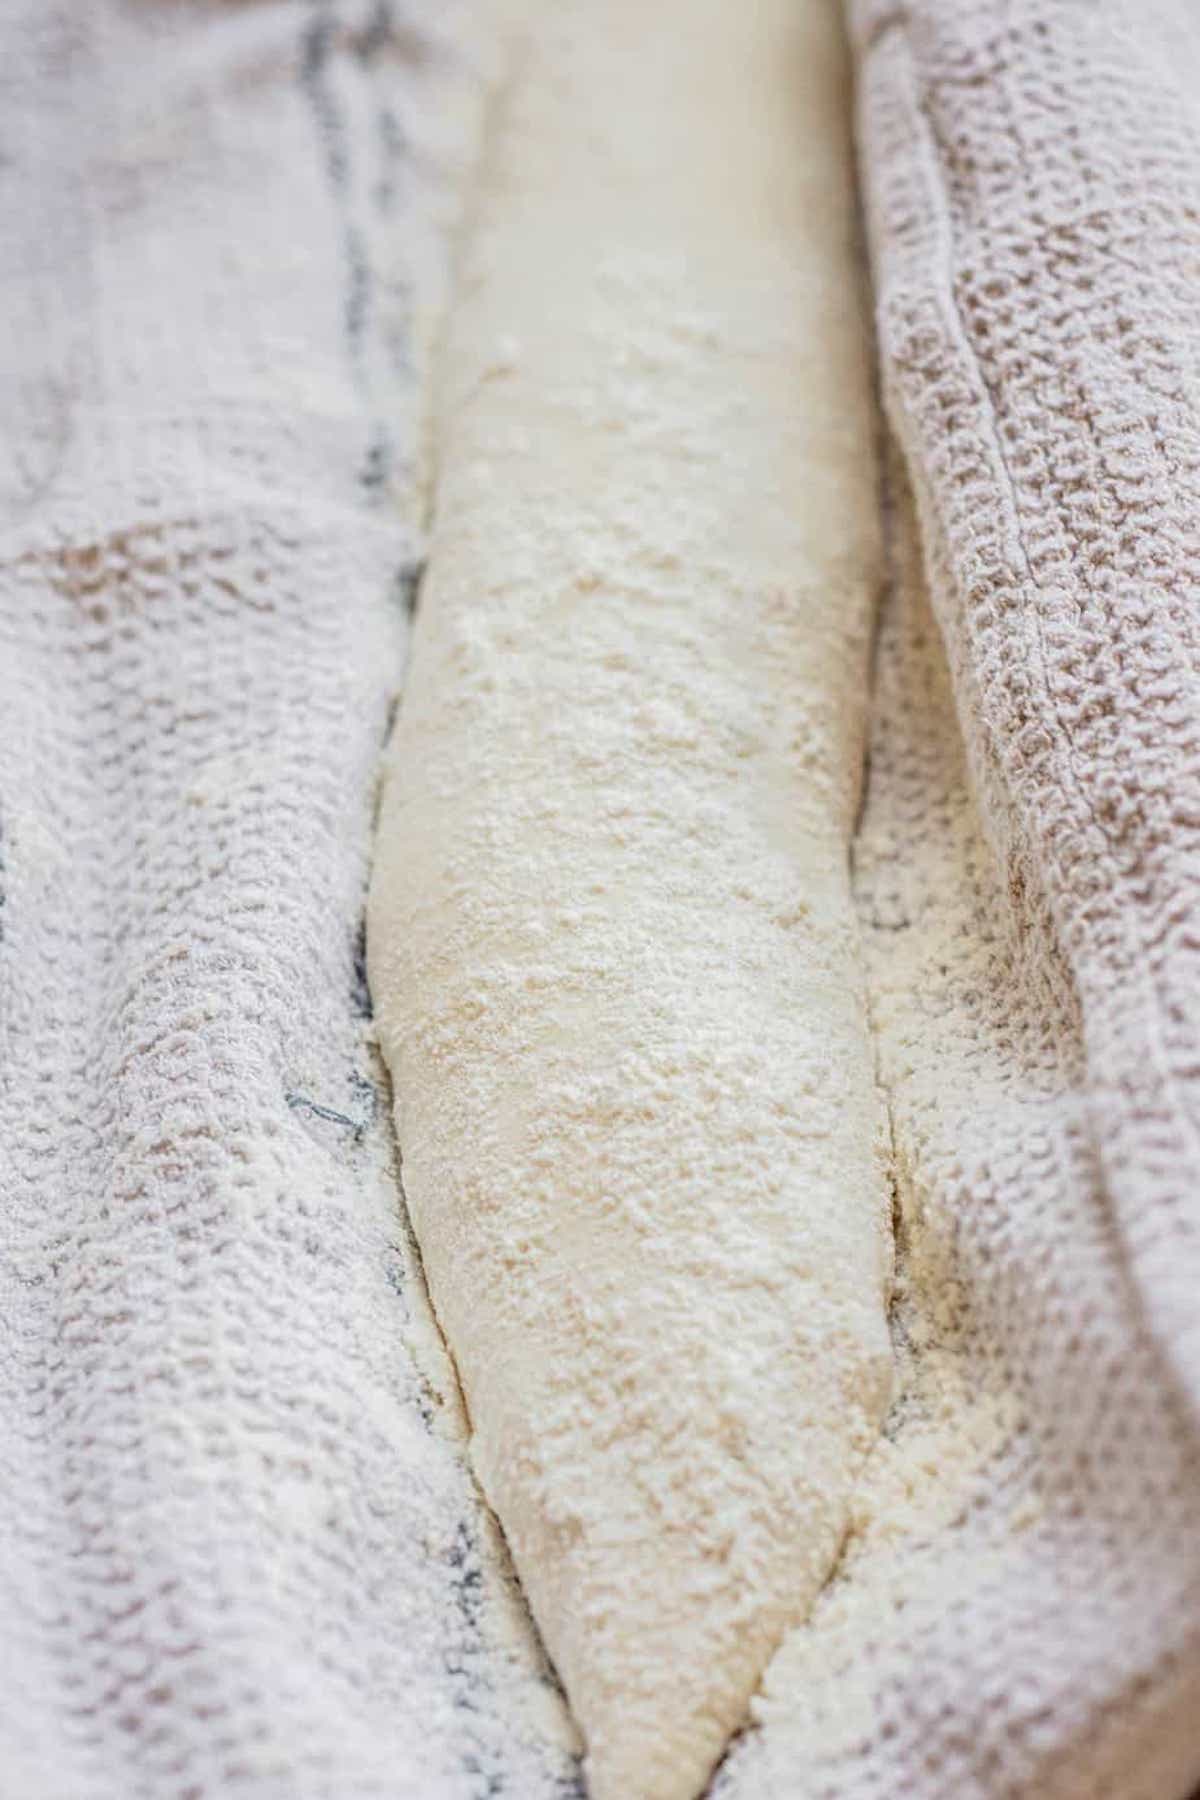
- Place the baguettes in a baguette pan or in between generously floured kitchen towels or a cloth couche.
- If you don’t have a baguette pan, crease up the sides of the towels to create ‘walls’ for the baguettes to rest against.
Cold Bulk Fermentation
- Dust the tops of the baguettes generously with flour and cover them with a clean kitchen towel or plastic wrap. Place them in the refrigerator for a cold-proof for 8-24 hours.
Baking
- The next day, preheat your oven and a baking sheet to 450 °F / 230°C. Add a baking pan or similar to the bottom rack of the oven to heat up, too. Later, water or ice will be added to this to create steam.
- Remove the baguettes from the refrigerator and lay a piece of parchment paper next to the baguette tray. Lift the side of the kitchen towel opposite to the parchment paper so it flips the dough upside down on the paper. I usually fit two baguettes per piece of parchment paper.
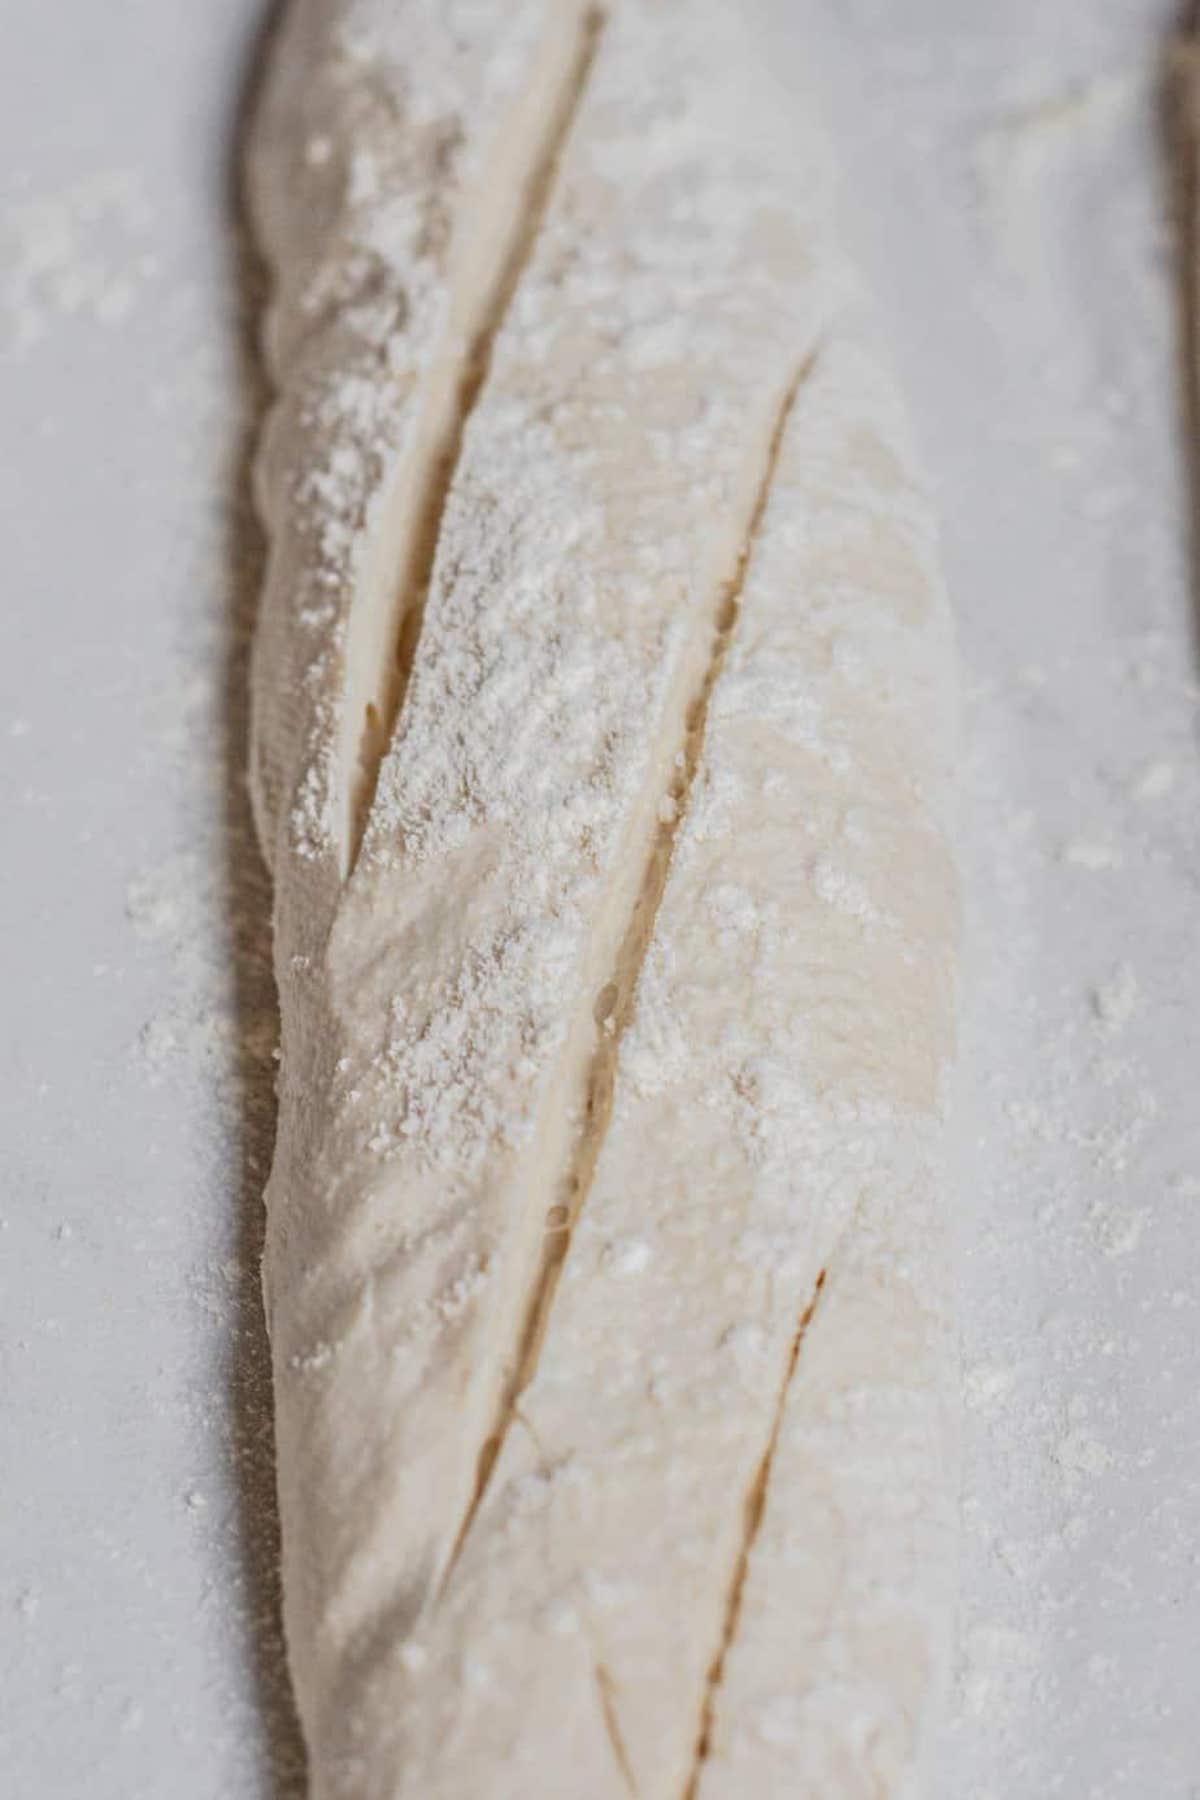
- Give at least 3 big angled slashes with a razor blade on top of the dough to allow the air to escape. How many slashes you do is up to you, but if you don’t do enough or they aren’t deep enough, the air will burst out where you might not want it to. You can use a sharp knife, which can tear the dough.
- When the oven is at a temperature, slide the parchment paper and baguettes onto a board and transfer them to the hot oven tray.
- Add 1/2 an inch of water to the pan at the bottom of the oven or a few ice cubes to create steam. This will help the baguettes to rise without their crust setting too quickly. When adding this water, the steam can come out fast.
- Bake the baguettes for 30-35 minutes until browned to your liking. I like to get mine a really deep golden brown, as thats where all the flavor is. Take care when opening the oven door, as steam can rush out.
- Let them cool on a wire rack before serving. Or, tear right into the crispy crust of a hot baguette!
FAQS
Dense sourdough baguettes may be due to underproofing, or a starter that wasn’t active enough. Make sure your starter is bubbly and active before you begin, and let your dough proof fully. Also, make sure your oven is super hot, and introducing steam into the oven when you start baking can help the bread rise and form a crispy crust.
To slice a sourdough baguette, use a bread knife with a serrated edge. This helps to cut through the crust without squashing the bread. You can either slice it on a bias for longer pieces, or straight across for shorter slices. Always ensure your bread has fully cooled before slicing to prevent it from getting squished or gummy.
Yes, you can make a sourdough baguette without a baguette pan. You can shape the dough and place it on a baker’s couche (or a floured kitchen towel). Crease up the sides of the towels to create ‘walls’ for the baguettes to rest against.
Sourdough baguettes may split or burst on the sides due to several reasons. The most common one is lack of scoring or improper scoring. Another big reason is underproofing the dough.
More sourdough bread recipes
Did you like these sourdough baguettes? Here are some more sourdough recipes to try! If you’re after a traditional sourdough loaf, try my step-by-step sourdough bread.

Sourdough Baguette Recipe
This sourdough baguette recipe makes baguettes with a classic, crunchy sourdough crust and a light and airy, chewy interior.
Ingredients
Levain
- 70 g sourdough starter
- 70g all-purpose flour
- 70g water
Dough
- 900g bread flour or strong all-purpose flour (minimum 11% protein)
- 650g water
- All the levain
- 17g salt
Instructions
Levain
- Mix starter, flour, and water and stir well until thoroughly mixed. Add it to a clean jar and cover it with a loosely balanced lid. Leave it to sit for at least 4 hours until it has well-doubled but not collapsed.
The dough
- Once your levain has nearly doubled, start the autolyze. In a large bowl, mix the main bread flour and water and use wet hands to bring it together into a shaggy dough ball. Cover and leave this to sit for around an hour.
- Add the levain and salt to the dough and mix it well with wet hands until all is combined.
- Leave the dough to rest for 10 minutes, then perform a stretch and fold set or coil folds (see the notes below for the difference between the two.)
- Perform 4 more sets of folds over the next 2 hours, one every 30 minutes. After this, cover the bowl and let it further ferment in a warm place, ideally around 25°C/77°F for 2-4 hours until it shows clear signs of fermentation and bulks by around 50%. This timing will significantly depend on your room temperature.
Pre-shape
- Gently tip the dough from the tray onto a lightly floured work surface and cut it into 4 even pieces. Use a kitchen scale to weigh the dough first to get them extra even.
- Take a piece of dough and form it into a square. Take each of the square's four corners and bring them, one by one, into the middle to create a little parcel. Flip this parcel upside down, so it’s seam side down, and then cup this gently in between your hands and rotate it around and around on the bench to form a ball.
- Leave the balls on a floured bench, covered with a tea towel for approximately 30 minutes until slightly puffed, and pass the poke test. Use a wet finger to prod the dough. If it pops back out slowly and leaves a slight indentation, then it's ready. This may take longer if your room is colder.
Shaping
- Grab a dough ball and place it seam-side up on a floured work surface to shape the dough. Gently form it into a horizontal rectangle.
- Take the top third of the dough and fold it up to meet the middle. Use your fingertips to push it down and seal it together. Rotate the dough 180 degrees, and do the same to the top third of the dough.
- Fold over the top layer again with your left hand, but in small increments, starting at the top right corner. For each bit, you fold down, use the heel of your hand to push it in, and elongate the dough. Lengthen them to around 30cm/12 inches.
- Start rolling it on the bench to lengthen it, tapering off at the ends to get that traditional baguette tip. It's helpful to brush some of the flour away before this step of the shaping, as the baguettes will need to grip the bench a little bit to create surface tension in the roll.
- Place the baguettes in a baguette pan or in between generously floured kitchen towels. If you have no baguette pan, crease up the sides of the towels to create ‘walls’ for the baguettes to rest against.
- Dust the tops of the baguettes generously with flour and cover them with a kitchen towel or plastic wrap. Place them in the refrigerator for a long cold-proof for 8-24 hours.
Baking
- Preheat your oven and baking sheet to 450 °F (230°C.) Add a baking pan or similar in the bottom of the oven to heat up, too. This is where water will be added to create some steam.
- Remove the baguettes from the refrigerator and lay a large piece of parchment paper next to the baguette tray. Lift the side of the kitchen towel opposite to the parchment paper so it flips the dough upside down on the paper.
- Give at least 3 big angled slashes in the dough with a razor blade to allow the air to escape. How many slashes you do is up to you, but if you don’t do enough or they aren’t deep enough, the air will burst out where you might not want it to.
- When the oven is at a temperature, slide the parchment paper and baguettes onto a board and transfer them to the hot oven tray.
- Add 1/2 an inch of water to the pan at the bottom of the oven or a few ice cubes to create steam. This will help the baguettes to rise without their crust setting too quickly. When adding this water, the steam can come out fast.
- Bake the baguettes for 30-35 minutes until browned to your liking.
- Take care when opening the oven door, as steam can rush out.
- Let them cool on a wire rack before serving.
Notes
Stretch and fold
Using wet hands, take one side of the baguette dough and stretch it up, then pull it over itself.
Turn the bowl a quarter turn and repeat this move.
Continue stretching, folding, and turning the owl until all sides have been folded.
That is 'one set' of stretch and folds.
Coil folds
Coil folds are great when it's a wetter dough like this baguette recipe. Using wet hands, coax the sides of the dough up with your fingers and lift it from the middle and back onto itself.
Turn the dough and repeat on all sides until it forms a ball. If the dough sticks too much to your hands, wet them again.
Recommended Products
As an Amazon Associate, a Mighty Ape affiliate and member of other affiliate programs, I earn from qualifying purchases.
-
 Professional Bakers Couche Pure Flax Linen 100% Bake Ware Canvas Bread Baguettes loafs Proofing Cloth (26x23)
 -
Etekcity Food Kitchen Scale, Digital Grams and Ounces for Weight Loss, Baking, Cooking, Keto and Meal Prep, Medium, 304 Stainless Steel
-
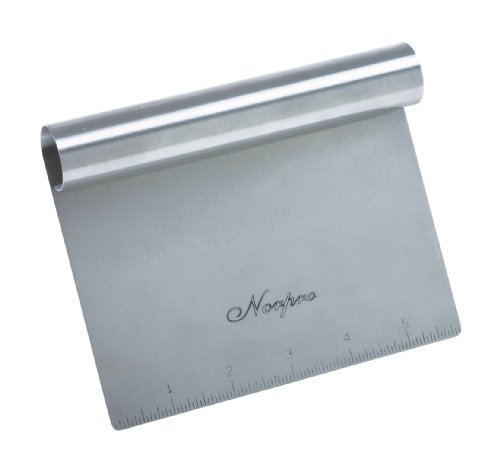
Dough Scraper
-
Bates- Single Edge Razor Blade, 50 pc, Razor Blades Scraper, Razor Blades Single Edge, Scraper Blades, Flat Razor Blade, One Edge Razor Blade, Single Sided Razor Blade, Single Edge Blades, Razor blade
-
Baguette Pan 2 PCS Bread Pan Baguette Pans for Baking Bread Pans for Baking French Bread Loaf French Bread Pan Nonstick French Baguette Pans (15" x 6.3")


Nutrition Information:
Yield: 12Amount Per Serving: Calories: 340Total Fat: 1gSaturated Fat: 0gTrans Fat: 0gUnsaturated Fat: 1gCholesterol: 0mgSodium: 586mgCarbohydrates: 69gFiber: 2gSugar: 0gProtein: 11g


Thanks for this excellent, easy to follow post. I have successfully made these twice now.
Thanks so much for letting me know Ann! That’s great to hear!
Oh ok yes I bake in dutch oven also will tey next time with fan bit for color I am putting 1/2 tsp liquid malto it gave nice crust and color to loaf I am baking 30min covered on 230c and then 20min opened also 230… I dont like to hard baked sort like birned but stil I get nice color and I guess because of malto 😉
Ony think that I am trying to figure out why sometimes baked loaf from insode is sort like gom or little bit wet I dont know would like to get more dried from inside bit then if I bake longer it will burn outside or this os just who needs to be with soirdough or maybe moer proofing in fridge needed I keep for 8 hrs .. not sure about this one 😔
A gummy texture can be from a few causes.
An underproofed loaf, you may need to keep it on the bench to bulk proof a little longer before placing in the fridge. Was it bulked out by 50%, does it bounce back when touched with a wet finger?
At the same time it could be overproofed and risen too much and too fast before placing in the fridge. If it’s very hot in your kitchen can be an issue. An overproofed dough will loose its structure and become slack and spread out.
Lastly it can also be that you are cutting it too soon. If the bread hasn’t cooled down properly, the steam trapped inside the loaf can make it gummy when cut.
Hi! I want to try your baguette recipe! I was wondering how many baguettes this is I tended to make? Also, I do not have a convection(fan) oven so would I increase the oven temp a little bit? Thanks can’t wait to try!
Hey it makes about 4 depending on how big your roll them. You could increase the temp a bit but the main thing about a convection oven is the fact that they give a more even bake. If your breads are browning unevenly, turn the tray in the last 10 minutes or so to give a more even browning 😊
I made these and I love your detailed instructions! I was wondering g if you wouldn’t mind saying though how long about each baguette should be? I think I made mine to skinny and long??? They are each just over a foot long.
That sounds about right! They’ll puff and fatten when they’re baked 😊
Thank you. This is a really well done tutorial.
Done this 3 times now. Such easy to follow instructions, and great results every time. Thank you
I’m so glad you’re enjoying the recipe! 😊
What will happen if I skip the overnight step?
Hi Elien, Thanks for your detailed sourdough baguette recipe and procedure. I have just finished my first bake, and the baguettes have turned out well . However, one problem I encountered was that although I used only 600g water, I still found the dough too wet at steps 6 and 7, making it very sticky when trying to form and shape. Any suggestions?
Heya 😊, have a read of this post, it could be your starter, https://homegrownhappiness.com/sourdough-bread-trouble-shooting-guide/
Hello, thanks for the recipe. I was wondering when you put the baguettes in the fridge, do you cover them with plastic film or a towel? Or just leave it open?
Thanks!
Hey I cover them with a lightly dampened tea towel 😊
thanks!! and one more question, because it says to bake at 250 but then in the recipe says at 230, which one should I follow for a fan-bake? Thanks 🙂
230 for fan-bake, I’ll change that in the post 😊
Can I cut the recipe in half?
Yup absolutely 😊
Do you think it would be a problem if after completing step 6 I placed them in the fridge over night and then picked up the next day? If so, how long do you think they would need to rest again in loaf form?
I can’t be sure without trying it myself but I think you could shape them the next day and let them proof at room temperature, until they pass the poke test, where you can poke the dough with a wet finger and it should slowly fill back out by half) and then bake them from room temp 😊
So I actually tired it last night. Made it through step 6. Put the balls of dough in the fridge for about 16 hours. Then I took the balls out of the fridge, complete the formation and let rest about 30-45min while the stove warmed up and then baked. Perfect!! Thank you!!
That’s brilliant to hear! 😁
Really great post. This answered the majority of my questions. When I read this I actually opened up a word document and started taking notes haha.
I have been baking sourdough baguettes using my own recipe and method for a while now. I have also experimented with existing recipes, like yours. They always turn out beautiful, so that’s great. However, I do have one or two questions.
I usually bake them in a baguette baking tray, to make sure they round and proof well and don’t flatten out during baking. I add strips of baking foil below the baguettes in the tray so as not to have to much trouble getting them out. The bottom side of the baguettes don’t brown though. I have tried some remedies:
– Flipping them bottoms up half way. This kind of does the trick, but the baguettes turn out a little crooked that way.
– Transferring them out of the tray half way and on to a hot pizza stone (as the tray is no longer necessary once the baguettes have formed in the first baking period. This still does not brown the bottom though.
What do you advise? In all the recipes and videos I don’t see any flipping upside down. I have tried my oven both on ventilator and on top/bottom heating.
Can you substitute a room temp proof for the cold proof and bake the same day?
I really like a slow cold fermentation too but you could always try without 😊
I have to work in the shape, but the taste is amazing! Thank you for sharing!
So glad you love them 😄
Hi, what stage can this be refrigerated at? I’m not going to have enough time if I don’t slow some of it down, thank you
If you look at some of the older comments, someone tried with refrigerating it earlier and had good results 🙂
Thank you Elien. I have made it and it came out great. Easy to follow your guidance.
Thank you Nomi! So glad you loved them
I made this and it was delicious. Except, I wonder is it normal to have the crust hard after baking? It turned softer after i store them in a bread container the next day.
Hey 😊 yeah a crispy hard crust when they come out of the oven is the idea. The steam of the water helps to create a crust like that. It should soften after it cools down for 3-4 hours, but we love it for the crust so mainly eat them hot!
Thank you so much for sharing the recipe!
Question: I have only all purpose flour availabe right now – is there any changes in the recipe I have to make? Like less water, for example? Or you will not recommend baking the baguettes with this type of flour at all?
Hey! All-purpose flour usually has a protein level of at least 10.5 or above I think? In New Zealand, I’m fairly sure it’s the same as our high-grade flour which I use for bread. So yes you can use all-purpose 🙂
Thanks for the recipe, my baguettes turned out great.
That’s awesome! Thanks for trying my recipe ☺️
These were really tasty! Mine ended up a bit on the flat side, though, even though I scored them and added an ice cube to a hot tray. I think I waited a bit too long and my levain had already peaked and started to collapse. Either way. Very yummy! Next time I may make more of a batard shape rather than a baguette.
I love that you timed these out so you can do all of the heavy lifting the day before. My first attempt at this however was a baguette with a really tight crumb – it didn’t rise much, but those who tried definitely still thought it was delicious. I used the same ingredients in your recipe but fell behind in the timed execution of each step and let it undergo it’s long rise before I’d divided into four sections – I believe, owing to a 30-45mn final rise after being shaped, the baguettes did puff up a bit more. 🙂
So glad you found the timings that work best for you with this recipe! 🙂
Absolutely perfect recipe. I’ve baked these twice, and followed the recipe exactly. The baguettes were beautifully formed, airy, crusty and delicious. Thank you.
Hi Elien, Thank you for the delicious recipe. I’ve never made baguettes before so your directions and videos were a big help. They came out looking perfect and tasted even better. It was really helpful to have the timing sequence that you provided to help me plan out the recipe. Thank you for being so thorough and clear! I’ll definitely make these again and again!
Thanks so much Lori! I’m so pleased you like the recipe 😀
Im really confused, how much active starter do i add to the dough??
it doesn’t say. it says how to do a 1 1 1 ratyio to feed the starter but thats it
plz tell me how much many grams of active 1 1 1 ratio starter to use
thank you
Hey it is written in the post that in this recipe I make a separate levain, of which the entire amount is used in the recipe. The amounts (70g each of water starter and flour) are listed in the recipe card.
Rolling these off onto my baguette pan was tricky and messy. Can you add a video that demonstrates how you get yours transferred?
Hey that’s a good idea, I will try get one up soon!
Can we use all purpose flour? What type of flour is “high-grade”?
Hey high-grade is the bread flour we commonly use in NZ, but yes it should be the equivalent of all-purpose, with a protein level of at least 11% 🙂
When you place the formed baguettes in the refrigerator, do you leave them uncovered? Or do I need to wrap them with plastic before putting them in the fridge?
Sorry if this has already been asked. I just did a quick search. Thanks!!
Hey I place a tea towel over them but you can use plastic wrap if you like!
Really great recipe! Super easy and some of the best sourdough I’ve ever made.
Thank you so much! I’m so happy you loved them!
Hello can I use 900g whole wheat flour instead of all purpose flour?
I wouldn’t recommend it, it will make much denser baguettes
Thanks Elien. What about 600g APF and 300g whole wheat? Do I need to alter your other ingredients such as water because of more wheat flour mix?
That sounds good, and I would use the 75% hydration option 🙂
Excellent baquette!
Can I add olives to this recipe? If so, any recommendations as to quantity and when would be a good time to add them?
Thank you!
Yum adding olives would be great! I would do a few sets of coil folds first to create some structure, and then add the olives and continue the rest of the folds. Perhaps 1 1/2 cups – 2 cups chopped olives to start with.
Hi can these be frozen and reheated without changing the texture.
Hi, when they go into the fridge for 8-20 hours, do they need to be covered?
Thanks,
Jupi
Hi Jupi, yup they can be covered. I use a tea towel 🙂
I am wanting to bake this recipe in the Challenger pan which will bake 2 Demi baguettes at 300g each. I’m wondering how many grams of dough this recipe yields. Thanks
I assume you mean 446F, not C, right?
I do! Thanks for spotting that 🙂 I have fixed it up
Hi. May I know your room temperature in this recipe? I live in Singapore, hot and humid. Not sure whether I should cut down the bulk fermentation time? 🙂
You might have to lessen it. Keep an eye on the dough, it should become a bit fuller and when poked with a damp finger, leave an indent that fills back up about half way. That’s when it has bulked enough. 🙂
I’ve tried the recipe three times pretty exactly and three out of three the baguettes have come out dull with no crust layer and this last time gummy. I am baking them in the baguette pan (not preheated) because that’s what they rise in. Also using a loaf pan full of ice to create steam. Any ideas why I can’t get a shiny crisp crust?? On a side note they do taste fantastic I’d just like for them to look as good as they taste.
Hey, if they are gummy that’s a sign of under proofing and the proofing time may need to be extended.
Did this on the hottest and most humid day we have had for months here in UK. The dough was very wet and sticky and at the last stage of rising it all kind of ran into one big mush. I bake sourdough regularly and this is new. About to bake them so fingers crossed!
Hot weather can be so tricky with sourdough because of over fermenting!
You wrote 900 without any measurement when you list the flour to be used for the dough. Could you tell me which measurement you meant? I’m assuming grams, but I wanted to make sure
I do mean grams! Thanks Keeli, I’ve added that in now ☺️
I’m so excited, my dough is really stretchy!! It’s been in the fridge overnight. Can I bake these on a pizza stone?
Yup you can 🙂
Awesome baguettes just made your recipe left for abput 20 hours in fridge and they came out perfect. Thanks
Thanks for the recipe! You say the ice goes alongside the dough…on the same pan or below on their own pan? Thank you 😊
Below in its own pan 🙂
Hello!
When I have my sourdough starter in the fridge, should i feed it to be active and bubbly before than making the levain with it?
Thank you!
If it has been in the fridge a while, giving it an extra feed to make it active again is a good idea 🙂
Can I overnight rest and bake on the same baguette tray or will that ruin it that it isn’t preheated?
You can do it that way, as long as the oven has been preheated 🙂
How many grams should each baguette be please.
About 440 grams, more or less depending on how long you left it to sit out bc water evaporates, and depending on how much water you put in.
I started this at three in the after noon without reading the full recipe .. ha ha ha. was able to go to sleep at 12 after shaping the balls then had to wake up at three am to form baguette. So prepare and read full recipe before hand😂😂
This recipe looks complicated but it was actually very simple. The process and time is well worth it. My Christmas crowd enjoyed the baguettes and I was very proud I made such beautiful loaves.
Just made this and very pleased with end result. Instructions very clear & helpful. Thank you!
Thank you Roberta, so happy you enjoyed it!
Hello! I am new to sourdough baking so very much still learning. I am going to try this recipe and have 2 questions: 1. Is a baking stone a recommended investment? 2. Is baking with the fan preferred over conventional oven?
Heya, a baking stone is a great investment because it holds heat so well. You can bake with a regular oven or fan, it depends on what works best for you and your oven as each oven is so different 🙂 I quite like my fan oven as it bakes more evenly than my regular oven.
HI, Going to start this tomorrow. Is it possible to freeze one baguette, and if so, would I freeze it after the cold-rise in the refrigerator? I do that with pizza dough, and while the defrosted dough hasn’t got quite the punch of the fresh, it’s fine. I ask because I cook for just the two of us, and two baguettes would be too much (well, we’d probably make short work of eating both but are of an age that we need to watch calorie and carb intake!). Thanks.
Hey Patricia, you could freeze the unbaked loaf though I haven’t done that before so I’m not sure how it would bake after.
Another option is to bake the loaf through, but only until light golden brown. Cool to room temperature and then freeze. After thawing it you can then continue baking it for another 10-15 minutes to colour it up more.
Thank you! Maybe I’ll try both methods to see which gives the best result.
Hi! Great looking recipe.
I have baguette pans given to me for my birthday. Do I just prove the baguettes in them in the fridge then tip out onto a pre baked tray, or bake in the baguette tray?
Obviously the baguette pans wouldn’t be pre heated as the baguettes are in them proving etc.
Not sure what to do with them?
Thanks!
Jack
Hey Jack, I use my trays just to hold the bread shape and then transfer them to a baking tray. I have baked them before in their baguette pans but had a hard time with the bread sticking to the baguette pans afterward!
Brilliant, so prove in the baguette trays then tip them out.
Also, could I make these, then bake them this wknd and then freeze them for next weekend? Then maybe put them in the oven with a splash of water once defrosted?
Thanks!
Yeah for sure! 🙂
Would you recommend anything else to keep/make fresh for a following weekend?
Thanks!
This happens with every recipe I try. The dough is soft and puffy during the initial rise and shaping. Then after the cold ferment it is flat and lifeless. Cooks up with randomly high spots, but is dense as all get out. Why the cold ferment? It looked perfect before that! My poor baguettes look like the loch ness monster.
Hey Janelle, the cold ferment is there to give a deeper flavour profile. If you want to try a same-day bake you can do that instead 🙂
Thank you, Elien, I will try that. It is so perfect before it goes into the ‘fridge. I will try these again.
Oh, and I am going to go over your sourdough troubleshooting guide VERY carefully.
Use approximately 200g fed and active starter
So no need for the levain? just feed my starter, leave it out overnight, and use 200g with the autolyse?
If making a leaven use 70g of your starter and feed it 70g flour and 70g water as per the recipe, but alternatively you can feed your starter as per your usual way overnight and use that in the morning. As long as it nice and bubbly and not past its peak 🙂
Great! One more question if you don’t mind. I fed my starter this morning to be ready this evening to do the levain. But now I want skip that and just use the starter.
Is it ok to just feed the starter again for overnight tonight and leave room temp? Or is that too much feeding/leaving out?
This would then be 200g eventually right?
Thank you
Yup that’s totally okay :). However if you’re feeding your starter overnight you might want to feed it 1:2:2 or 1:3:3 (starter:flour:water), so it doesn’t rise too fast overnight and collapse by morning.
You could do for example 40g starter, 80g flour and 80g water, or 30g starter, 90g flour, 90g water if your kitchen is warm overnight.
Hi! This is an old post but hopefully you will catch this comment. If I wanted to halve this recipe so I use 35 G each of the leaving ingredients?
Yup 🙂
Do you have ounces and cups recipe?
No sorry, I always use grams for bread
Hi Elien!
I would like to preface with the fact that I am a new to sourdough. I do have a starter that is established (it was a friend’s before it was mine) that I did follow all the instructions for, however, when I reached the stage of shaping the dough, I ran into a large problem…
My dough looked very good and felt normal up until the bulk fermentation. In the fermentation, it began to look a bit wet but I assumed this was because I went for a higher hydration ratio of flour/water in the autolyse and I live in a very humid environment. (I did use bread flour!) When I tried to shape…everything was much to wet and too sticky to get anywhere. From what I read, this may have been due to over-fermentation but I’m struggling to see at what stage I may have over-fermented as I did follow all your fermentation times. I’m wondering if you have any advice.
Hey Elizabeth. It’s always hard to gauge exactly what’s happened via text but I’ll see if I can help in anyway.
Was your dough just sticky or was sloppy too?because my dough is also sticky, but it’s still strong and elsastic. If your dough lost it’s elasticity it does sound like it might have over fermented. The fermenting times are always just a guide because it really depends so much on the temperature of your room. Your starter may have also played a part.
If you have an acidic starter (perhaps one that’s not fed that often, or you use a lot of seed starter in your feeding, or one that was used when it was past its peak) that also plays a part. If it brings too much acid into the dough it can break down the gluten structure.
If you’re working in a warm environment you could try feed your starter 1:2:2 Instead (1 part starter, 2 parts water, 2 parts flour). This will slow down the rise a bit.
And then when you make the dough, watch the dough and not the clock. Your dough should feel bouncy and elastic, even with a high hydration.
Just wanted to say a big thank you for sharing your method and recipe. I have made two batches so far and are extremely happy with the texture, appearance, crust and flavour. A little bit more work needed on my shaping but hopefully some additional tools will help (baking trays and linen cloche). My only complaint comes from my waistline.
Peter in Canberra
You’re so welcome Peter! I’m stoked to read that you’re enjoying the recipe 😀
I can’t use recipes that measure with grams. I need the US measurements Please can you help. P.S. I am new to sourdough baking!
Francesca, you should get a digital kitchen scale that is capable of weighing in grams. I bought mine on Amazon. Place an empty container on the scale and then zero it out. Then you can add ingredients one at a time, following the recipe. Weighing ingredients instead of measuring them will give the best results.
I find that it’s easy to find apps that do the conversion. Grams are so much more precise than US measurements.
Is there a time where I can stop and leave it in the fridge and pick back up in the morning?
Hey Lucy, you can let the dough bulk ferment for around 4-5 hours at room temperature, and then refrigerate it and shape it in the morning. Let the shaped baguettes proof for a bit at room temp before baking
Just wanted to say how much I love your recipes. They make me feel like the best baker ever. They always work! Love the bagels, pretzels, croissants and baguettes. Thankyou
Thank you Selena! That means the world to me reading this 🙂 so so happy you’re enjoying the recipes
I don’t always make exact levain amounts. Would the final levain weight to add to the recipe be 210g of starter?
How do recommend storing the baguettes? I normally plastic Wrap & then foil to put in freezer. Take out of freezer & reheat in foil. Thank you! Delicious recipe!
I just tightly wrap in foil and place it like that in the oven when I want to reheat it 🙂
I have been working with sourdough for the last few years as I have IBS and sourdough is a lot healthier than regular bread. I am excited to try your recipe. I am curious though about the nutritional value. Are you referring to 1 slice of baguette weighing 1 gram having 340 calories? My husband could easily eat almost half a baguette as a sandwich. He is super thin so I am not worried too much about the calories. I am not so lucky though and I love bread. Can you clarify please
Hey Mary, it’s meant to be 1 serving as 340 calories. And one serving I have calculated is 1/3 of a baguette.
Bear in mind I’m just using a free calculator for this so I can’t guarantee the accuracy of this.
These were delicious! I am baking them again because I like to have them in the freezer to pull out for a meal! Do you have a recipe for hamburger/ hotdog buns? Your instructions are very clear! I want to try your pie crust next! Thank you so much for sharing!
So happy you enjoyed them, Barb! I do have a hamburger bun post, here is the recipe
Im trying your recipe for the first time. One thing Im not clear about- when you lay the baguettes in the cloth for the overnight proof in the frig, they are top up. The next day you flip them over onto the parchment paper and score them. Does this mean the score lines are on the underside of the baguette? I have read this several times and cant work it out!
Also my dough looked good and formed nice tight balls, but I found that when I rested the balls for 20 mins, the rounds lost their shape and became sticky. The baguettes were hard to shape because of the stickiness. The ferment seemed OK (poke test). I used all purpose flour 10.5% – maybe this is the issue?
Thanks for your help
Hey Robyn sorry for the late reply! They do get scored on the underside :). hope they worked out for you!
If I make the dough up at night and do the folds before bed, planning to let it bulk ferment overnight, as these seem to have a shorter bulk ferment time how would I go about this? Could I cold ferment in the fridge overnight instead? And then shape in the morning?
Hey Court, you can cold-proof it overnight and shape in the morning. After shaping the loaves, let them proof at room temperature until a bit puffed before baking 🙂
Hello! So it’s about to be 1:30am in the morning(didn’t read the full instructions on how long it would take lol) I’m done with my last coil folds. I’m reading here that it’s OK to do a cold bulk fermentation in the fridge.? May I ask for how long can it rise in fridge(I don’t wanna leave it in there for too long)? Then once I take it out of the fridge then shape then let it bulk rise for 3 hours? Thank you in advance.
Hey! Yup you can leave it in the fridge overnight, up to 18 hours, then shape and rise in the morning 🙂
Hi there
thanks a lot for posting those recipes. Excellent!
I actually want to try your recipe for baguettes: I myself make them since some time already but I hardly use the autolyse and do the cold proof before shaping. I’ll try your suggestions and see how that changes the result!
One question though: you mention 900g of flour for 650g of water. That’s quite a high hydration level for baguettes, or? I myself use from 620 to 660g of water but that’s for a full 1kg of flour. With what you suggest, it would amount to ~720g of water which would lead (a guess) the dough to be quite “liquid”. Is there something I am missing here? (The levain is not a hard one, so that’s not the solution 🙂 ). I am using a “traditional” flour (65 – French – or 550 – Germany – depending on the country’s numbering scheme).
Thanks again for any tips you may have!
Hey
It’s around 74% hydration which is on the higher side compared to other recipes, but I almost always work with a hydration between 74-75%. As long as your starter isn’t too acidic, and you use good flour, your dough will gain strength and structure and not be liquid 🙂
Ok thanks. Will try this out then (I am more like 68-70%, so that makes quite a difference. when I usually go higher I need to take quite a different flour type). Maybe I need to find a different flour now… 😉 Thanks again.
Hi! Love this recipe! Quick question: I have the baguettes in my baguette pan in the fridge overnight. Do I have to flip them out of the pan then return them back to the pan bottom side up? Or can I just remove them from the fridge, keep them in the pan, score and bake? Thanks for your help!
Hey! You can bake them in the pan if you want, the only thing is to make sure they don’t stick. If they’re floured super well, or on parchment paper or the pan is non stick it will be okay but otherwise they might stick once baked
I love this recipe, it’s my second time trying it. I have a 5 qt Dutch oven I cook in. How do you go about putting 4 loaves, a foot long into a Dutch oven? You must have a really big one? Last time I tried open baking and it wasn’t hugely successful as I don’t have a pizza stone.
Hey, I don’t have a Dutch oven for this! I just use ice to make steam
Hi, Ellen. I always turn to your tried and true recipes for sourdough baking. I tried these for the first time and they turned out very flat. I’m an experienced sourdough baker so the issues wouldn’t be what a beginner might experience as far as not a strong starter, etc. I was concerned with such a short, 2-4 hour interval after the initial 2 hours of working the dough, but know baguettes can be different so I went with that. I felt then that the dough wasn’t bouncy and jiggly like I typically experience when adequately proofed, but again that’s with a much longer bulk so I just went with it. Perhaps it was an under fermentation issue? Would improper shaping cause this as well? Thanks, Ellen.
Hey Lori, it could be an under proofing issue so you can extend the dough proof past the time suggested, until you see it bulked out by 50% :).
Another thing might be the baking, baguettes need a very hot oven with lots of steam, if the oven wasn’t quite hot enough it can make them flat too.
hello there, i am pretty new at this whole sourdough thing but determined!!! i made these baguettes today…started yesterday. everything was going just fine, proofing, shaping, they looked so good going into the fridge, nice and puffy, i figured…i got this! when i took them out to bake them, they were sad deflated tubes. but i had faith and figured they would rise again while baking. unfortunately, not so much! they tried really hard to form those nice wholes inside but were too dense. what do you think happened? should i have let them rise a bit before baking? on the upside, the flavor was good! thanks for any info you can share. 🙂
Hey Carol, that’s unfortunate they turned out dense! It’s hard to know the reason why without knowing all the details about the proofing times or seeing the baguettes. But I’ve got two different thoughts on it – If you say they were puffy when they went in the fridge and deflated when they came out, they could have over-proofed and lost their structure. This can lead to a dense bread.
On the other hand, underproofing can also be a cause of dense bread, and that one can also present as a gummy interior. But you say they were puffy when they went in, so this might not be the case. Hard to know for sure though without seeing them! Next time, you could try it slightly differently if you like – Follow up to step 4 of the dough, and after it has bulked by 50%, refrigerate it overnight. Then when ready to shape, you can shape the cold dough, let them rise, then bake 🙂 This way lessens the chance of overproofing